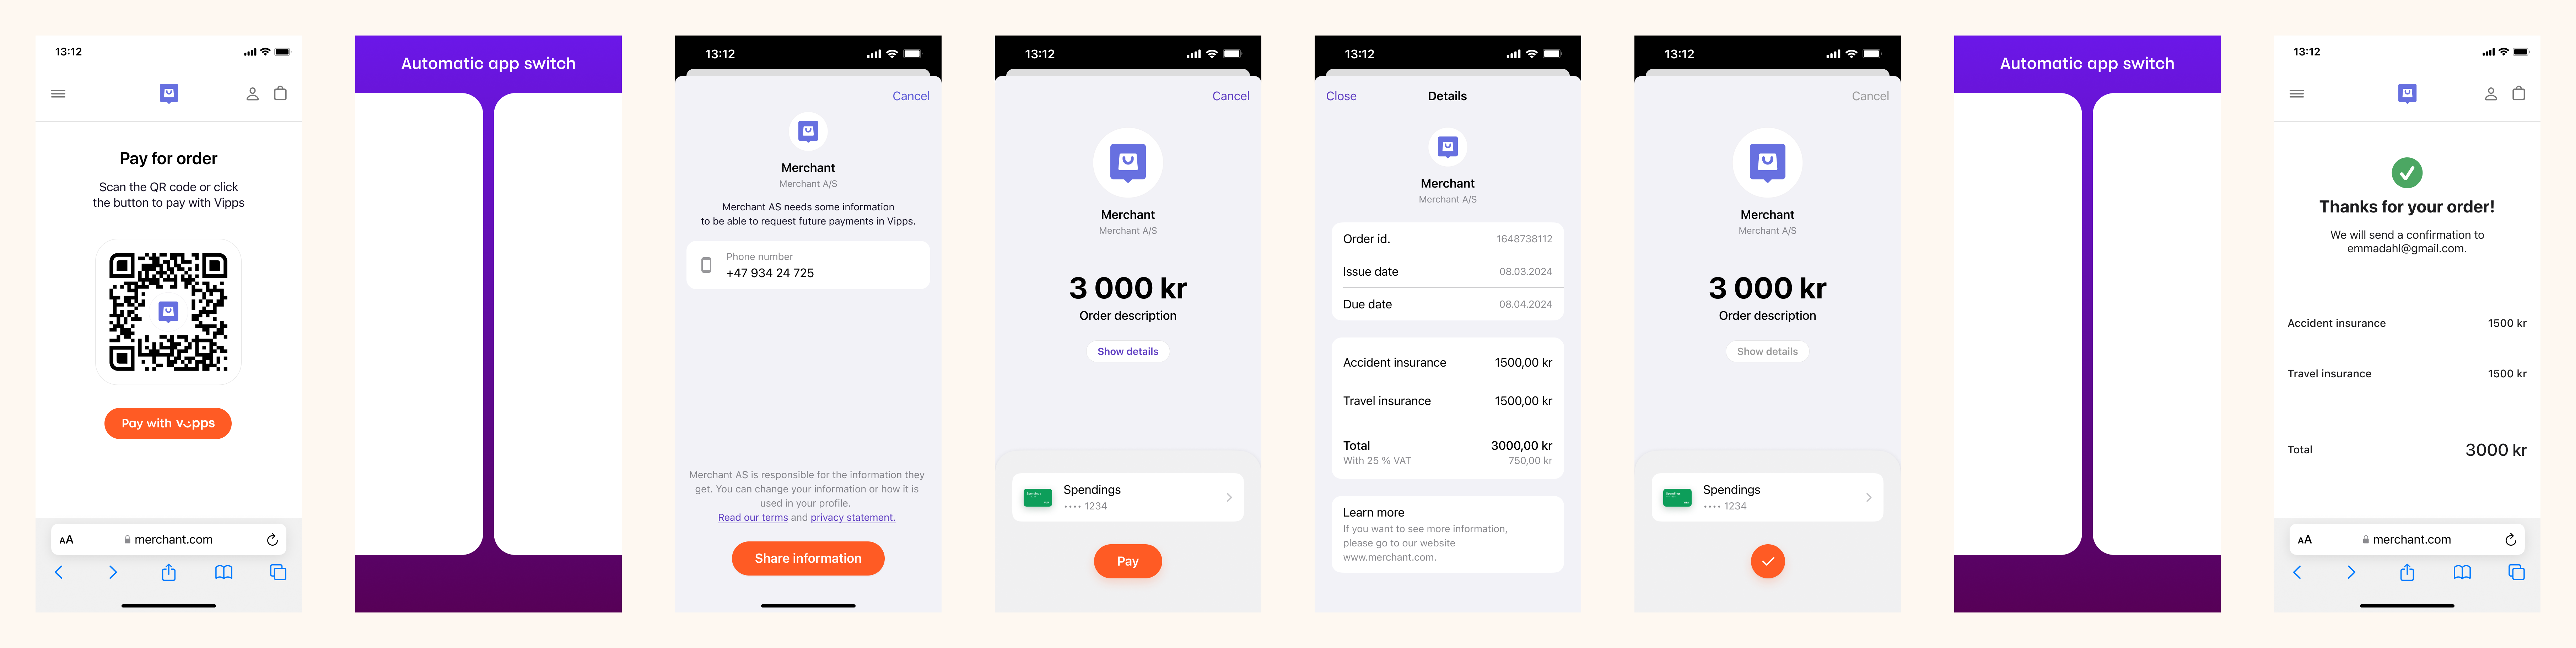
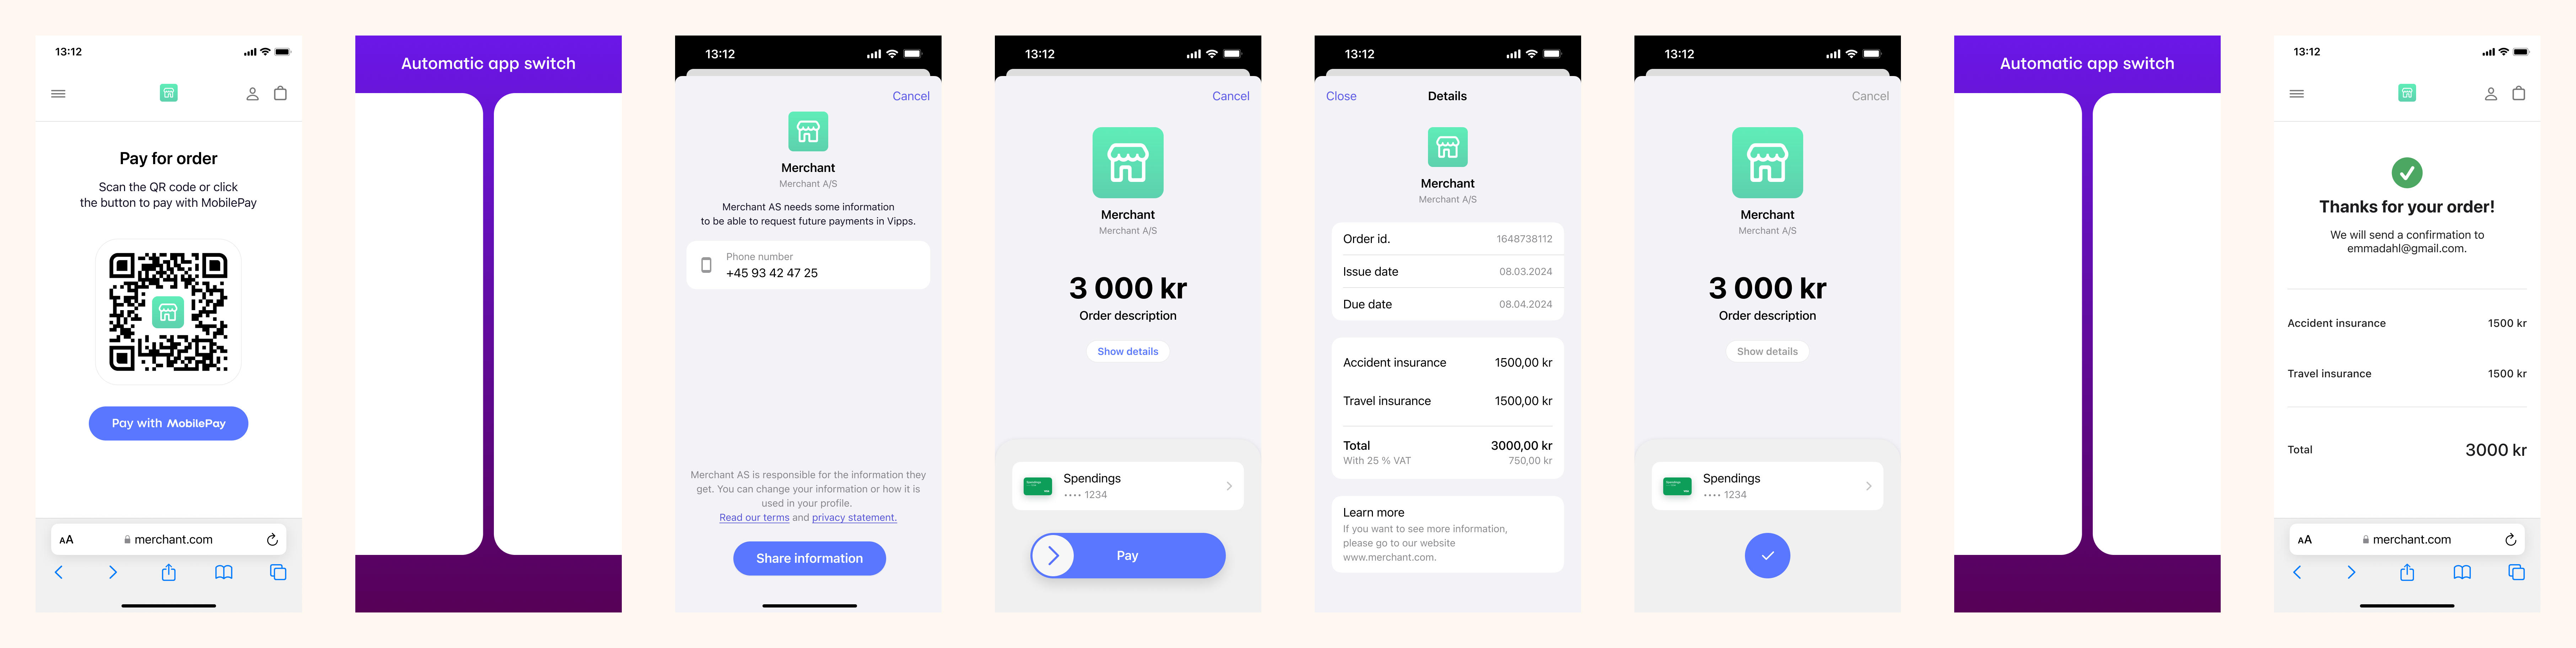
Payment request with sharing of telephone number
The flow for the customer will look like this:
- Vipps
- MobilePay
Prerequisites
QR code with to your page
Generate a merchant redirect QR code that contains the link to your website.
How to create a QR code
The QR code contains a Id that connects it to the taxi where it is located.
Here is an example HTTP POST:
{
  "id": "user34",
  "redirectUrl": "https://example.com/mybill/1234678"
}
Webhooks for ePayment events
Register a webhook to alert you when your payment requests are approved.
What are webhooks?
When changes happen to your payment request, events are triggered (for example: Authorized, Terminated, Aborted, Cancelled, Expired, and many more).
You can register to receive these events, which is useful for programming an appropriate and quick response.
The webhook will send a message to your web server at the URL you specify.
Here is an example HTTP POST:
{
    "url": "https://example.com/mystore_website_backend",
    "events": ["epayments.payment.authorized.v1"]
}
Use the secret to authenticate the message with HMAC. For examples, see
Webhooks API: Request authentication.
The payload from the ePayment webhooks will be in this form:
{
    "msn": "123456",
    "reference": "24ab7cd6ef658155992",
    "pspReference": "1234567891",
    "name": "AUTHORIZED",
    "amount":
    {
        "currency": "NOK",
        "value": 35000
    },
    "timestamp": "2023-08-14T12:48:46.260Z",
    "idempotencyKey": "49ca711a9487112e1def",
    "success": true
}
Note that the payload of the webhook depends on the originating service, in this case the ePayment API.
Details
This is very similar to Payment request as a link. In addition, you will ask the user to share their telephone number.
Step 1. Give the customer a QR to your page
Provide a QR code or link to your payment page.
Step 2. Create a payment request
When they select to pay with Vipps MobilePay, send the create payment request and include a consent request for the user's phone number.
Detailed example
This is done by setting the scope parameter with a value of phoneNumber in the request.
Set userFlow to PUSH_MESSAGE. This will send a push directly to the customer.
Attach the receipt simultaneously.
Here is an example HTTP POST:
With body:
{
  "amount": {
    "value": 300000,
    "currency": "NOK"
  },
  "paymentMethod": {
    "type": "WALLET"
  },
   "profile": {
    "scope": "phoneNumber"
  },
  "receipt":{
    "orderLines": [
      {
        "name": "Accident insurance",
        "id": "12345",
        "totalAmount": 150000,
        "totalAmountExcludingTax": 112500,
        "totalTaxAmount": 37500,
        "taxPercentage": 25,
      },
      {
        "name": "Travel insurance",
        "id": "12345",
        "totalAmount": 150000,
        "totalAmountExcludingTax": 112500,
        "totalTaxAmount": 37500,
        "taxPercentage": 25,
      },
    ],
    "bottomLine": {
      "currency": "NOK",
    },
   "receiptNumber": "0527013501"
  },
  "reference": 248679167965815592292,
  "userFlow": "PUSH_MESSAGE",
  "returnUrl": "http://example.com/redirect?reference=2486791679658155992",
  "paymentDescription": "Spendings"
}
After the customer has finished the payment, you will get their phone number to keep for future payments. This means that, in the future, you can send the payment request directly to them without requiring a new login.
There is more info about fetching user data in the profile sharing section of the ePayment API guide.
Step 3. Customer approves the payment
The payment request will appear in the customer's Vipps MobilePay app, where they can select to pay or cancel.
To get confirmation that payment was approved, monitor your webhooks.
Once the payment is approved, update the status in your system.
Step 4. Capture the payment
Capture the payment and confirm that it was successful.
Detailed example
POST:/epayment/v1/payments/{reference}/capture
With body:
{
  "modificationAmount": {
    "value": 300000,
    "currency": "NOK"
  }
}
Sequence diagram
Sequence diagram for the payment request with sharing of telephone number.