In-store payments with customer club
This flow makes a great product-market fit for retail stores that want to combine loyalty with payments. It's a great way to improve the payment experience for customers and simplify the process of adding customers to the merchant loyalty club.
The solution is a combination of the personal QR codes in the Vipps MobilePay app, the Login API, the ePayment API, and the Check-in API.
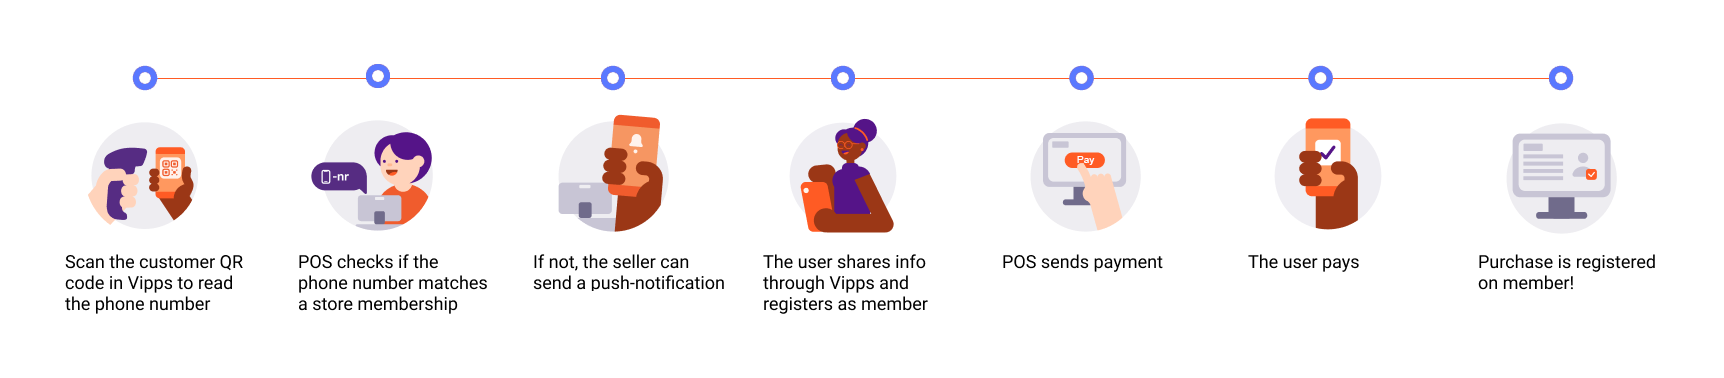
The following describes the process at a high level.
Prerequisites
Scanner
Your system needs a QR code scanner that your cashier can use to scan the customer's personal Vipps MobilePay QR code.
Webhooks for ePayment events
Register a webhook to alert you when your payment requests are approved.
What are webhooks?
When changes happen to your payment request, events are triggered (for example: Authorized, Terminated, Aborted, Cancelled, Expired, and many more).
You can register to receive these events, which is useful for programming an appropriate and quick response.
The webhook will send a message to your web server at the URL you specify.
Here is an example HTTP POST:
{
    "url": "https://example.com/mystore_website_backend",
    "events": ["epayments.payment.authorized.v1"]
}
Use the secret to authenticate the message with HMAC. For examples, see
Webhooks API: Request authentication.
The payload from the ePayment webhooks will be in this form:
{
    "msn": "123456",
    "reference": "24ab7cd6ef658155992",
    "pspReference": "1234567891",
    "name": "AUTHORIZED",
    "amount":
    {
        "currency": "NOK",
        "value": 35000
    },
    "timestamp": "2023-08-14T12:48:46.260Z",
    "idempotencyKey": "49ca711a9487112e1def",
    "success": true
}
Note that the payload of the webhook depends on the originating service, in this case the ePayment API.
Details
Step 1: Identify the customer
The flow begins with the customer presenting their Vipps MobilePay QR code to the merchant.
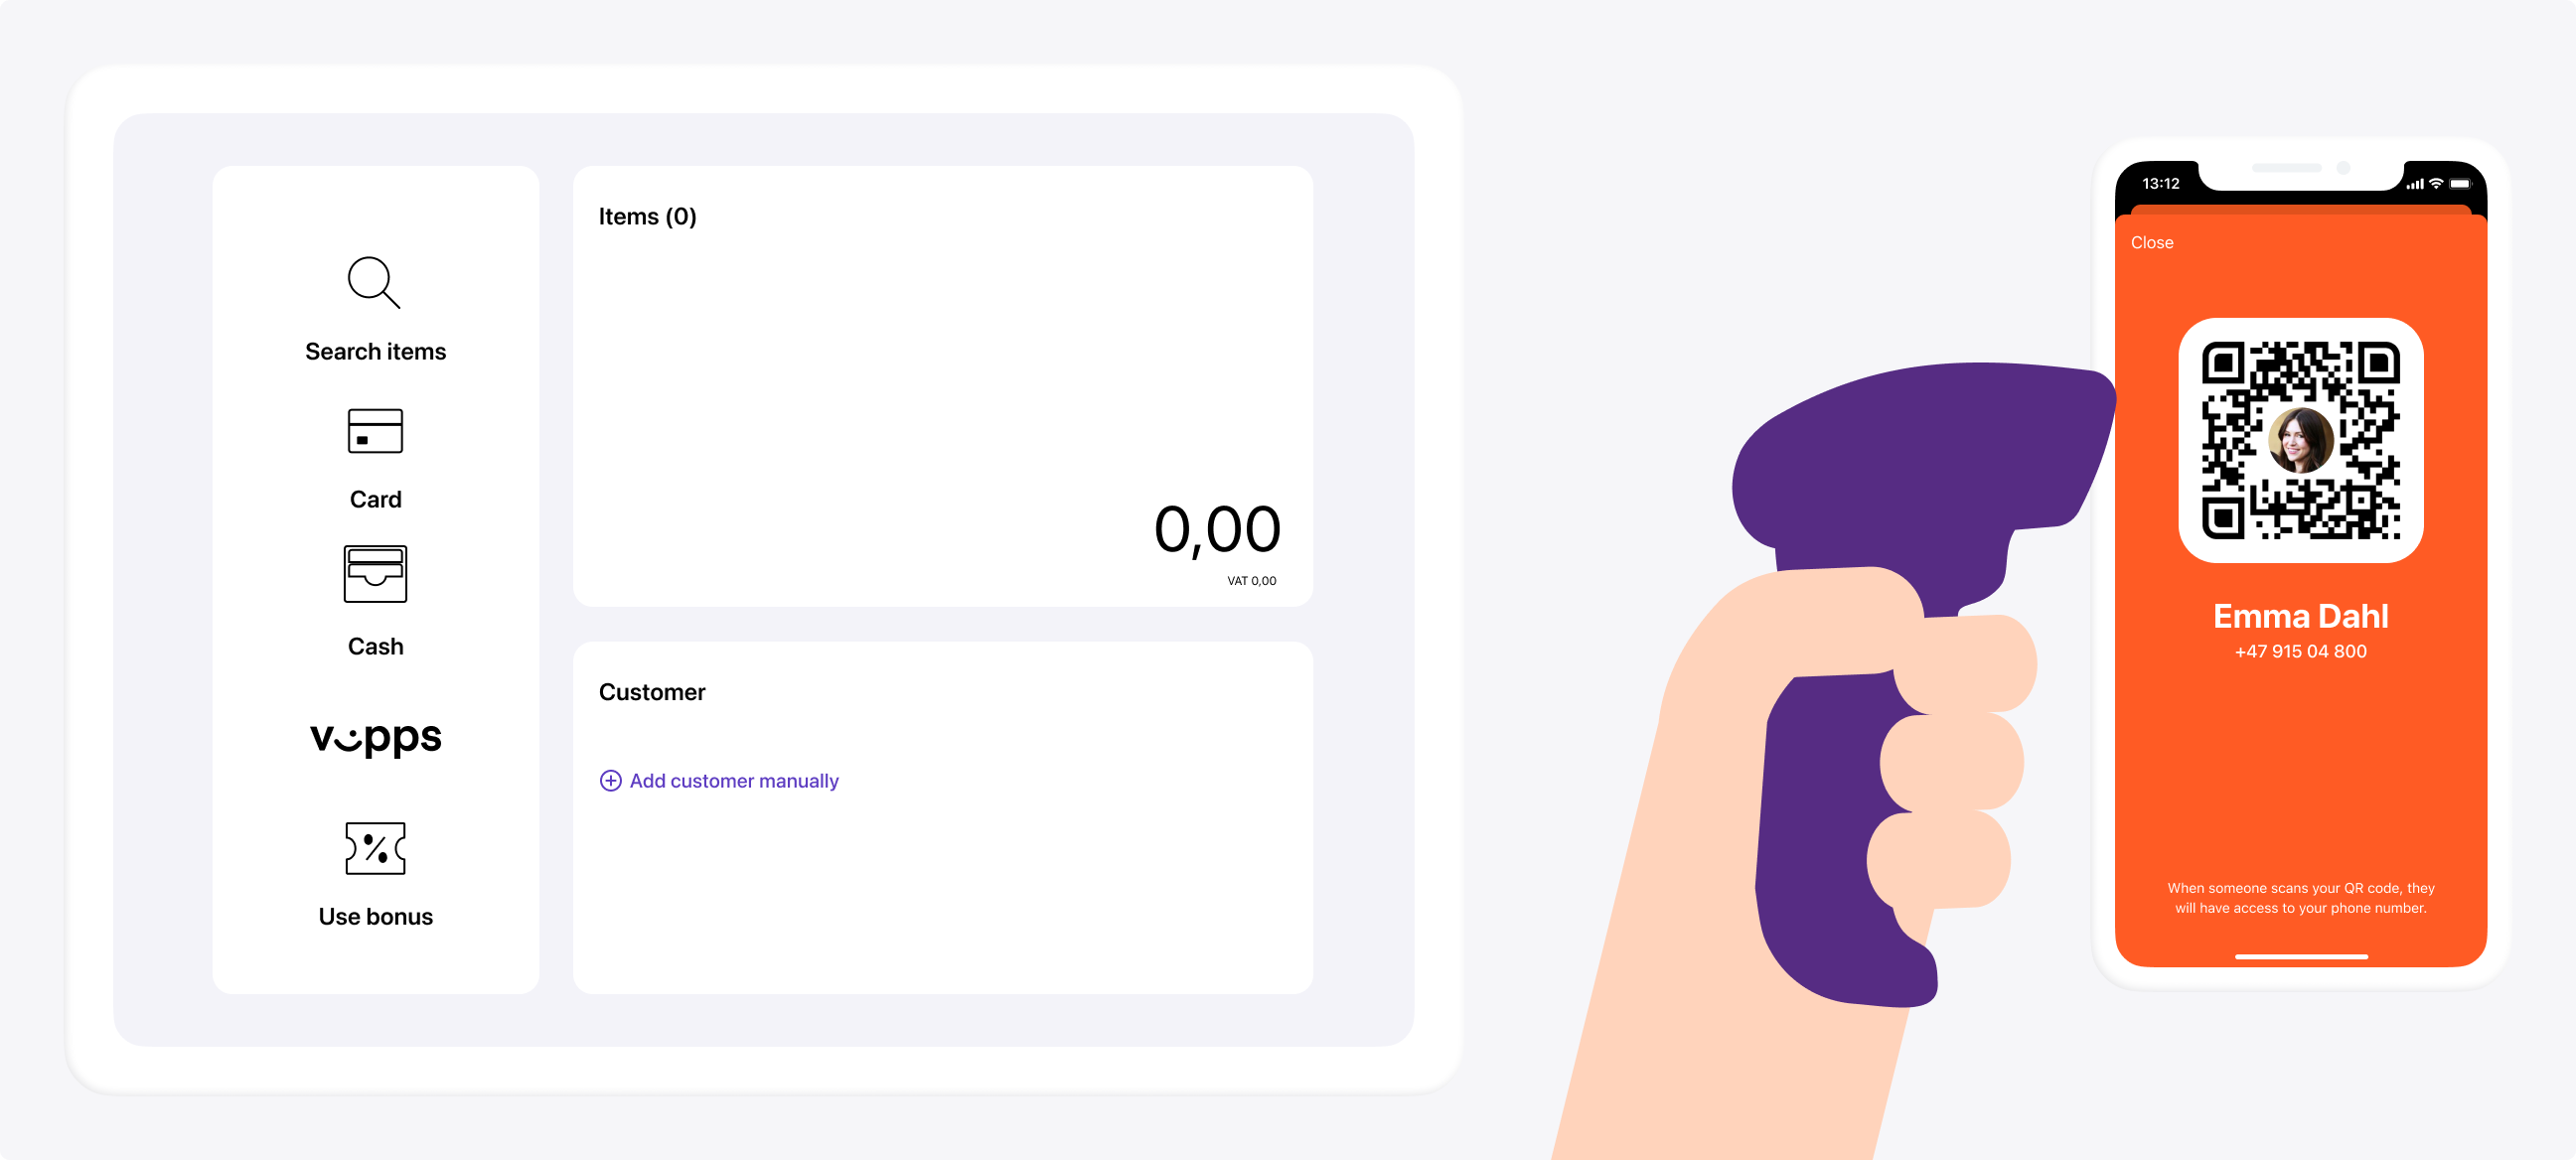
How it works
This can happen in two ways:
- Customer-facing scanner - The store will have a permanent customer-facing scanner and customers can scan their QR code at any time.
- Cashier scanner - The QR code is scanned by the cashier using a wired scanner. This could happen while the cashier is scanning wares or immediately before the payment.
The customer's personal QR code contains a URL like this:
https://qr.vipps.no/28/2/01/031/4791234567?v=1, where 4791234567 is their phone number in
MSISDN format.
When this QR code is scanned, your POS system will get their phone number. If you don't have a scanner, you can enter the customer's phone number manually.
Step 2: Check membership
In your internal system, check the customer's membership status by using the phone number you received in the previous step.
Use the Check-in API to trigger a waiting screen in the app.
Detailed example
Here is an example HTTP POST:
POST:/point-of-sale/v1/loyalty-check-in
With body:
{
    "phoneNumber": "4791234567",
    "loyaltyProgramName": "Acme loyalty club",
    "isMember": true
}
If the customer is a not member, proceed to step 3 where you can enroll them by using the Login API.
If they are already a member, skip step 3 and go to step 4 to send a payment request to the customer.
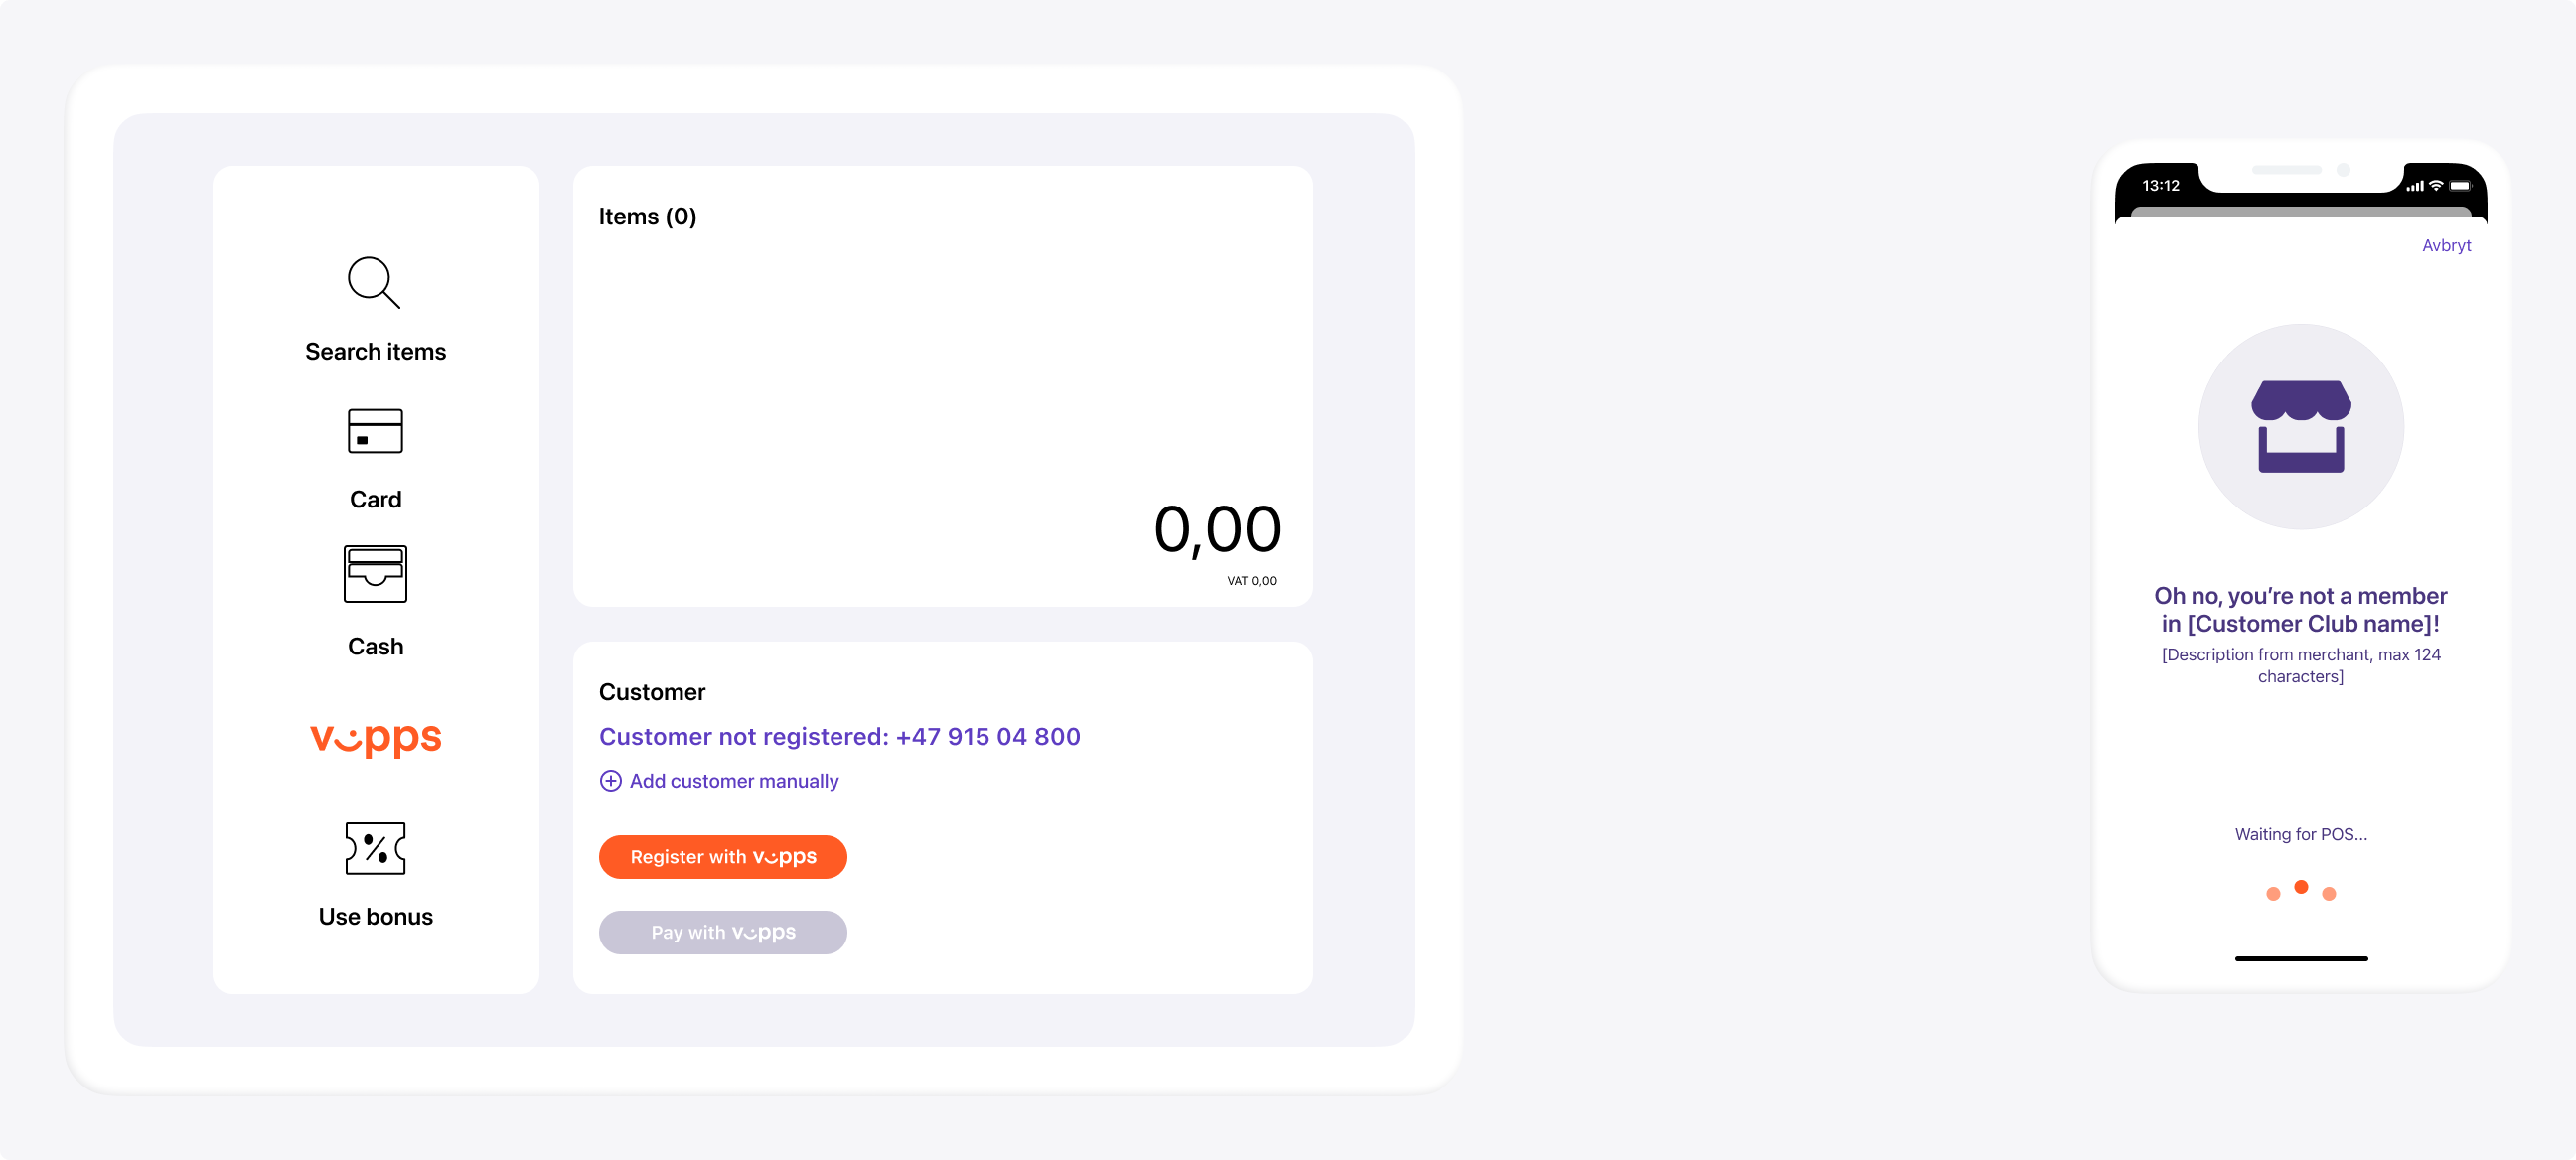
Step 3: Request membership (skip if already a member)
If the customer is not a member of the loyalty program, request to enroll them by using the Vipps Login API.
You already have their phone number from step 1, so just provide a button in your user interface to allow the cashier to initiate the login.
Pressing the button will trigger a Login flow to gather consent from the customer. The steps needed to get consent from the user are explained in detail there. The CIBA flow will send a push to the user, and once the user has finished the flow, it should be reflected in the POS.
When this login flow is completed, the customer will be enrolled in the loyalty program.
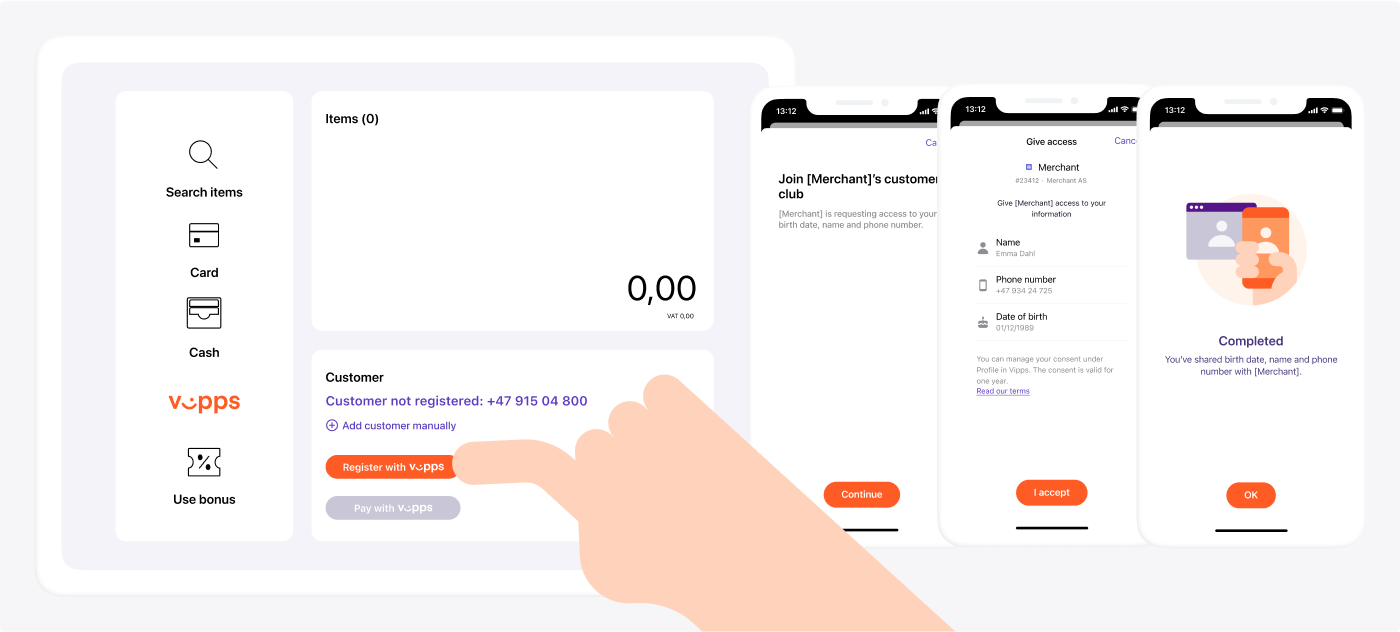
See Log in with browser for a detailed example.
Step 4: Add the products to be purchased
Add the products that the customer wants to buy in the POS system.
Step 5: Send a payment request
After membership status has been determined and all articles have been scanned, send a payment request to the customer.
Detailed example
You already have the customer's phone number from step 1, so you don't need to ask for it. Just provide a button in your user interface to allow the cashier to send the payment request.
Your system can send the payment request by using the
createPayment
endpoint.
Set userFlow to PUSH_MESSAGE. This will send a push directly to the customer who scanned the QR code.
Attach the receipt simultaneously.
Here is an example HTTP POST:
With body:
{
  "amount": {
    "value": 239900,
    "currency": "NOK"
  },
  "paymentMethod": {
    "type": "WALLET"
  },
  "customer": {
    "phoneNumber": 4791234567
  },
  "receipt":{
    "orderLines": [
      {
        "name": "winter jacket",
        "id": "jacket1234",
        "totalAmount": 239900,
        "totalAmountExcludingTax": 179925,
        "totalTaxAmount": 59975,
        "taxPercentage": 25,
        "discount": 80000
        "unitInfo": {
          "unitPrice": 319900,
          "quantity": "1",
          "quantityUnit": "PCS"
        },
      },
    ],
    "bottomLine": {
      "currency": "NOK",
      "posId": "pos_122"
    },
   "receiptNumber": "0527013501"
  },
  "reference": 2486791679658155992,
  "userFlow": "PUSH_MESSAGE",
  "returnUrl": "http://example.com/redirect?reference=2486791679658155992",
  "paymentDescription": "Winter jacket - blue"
}
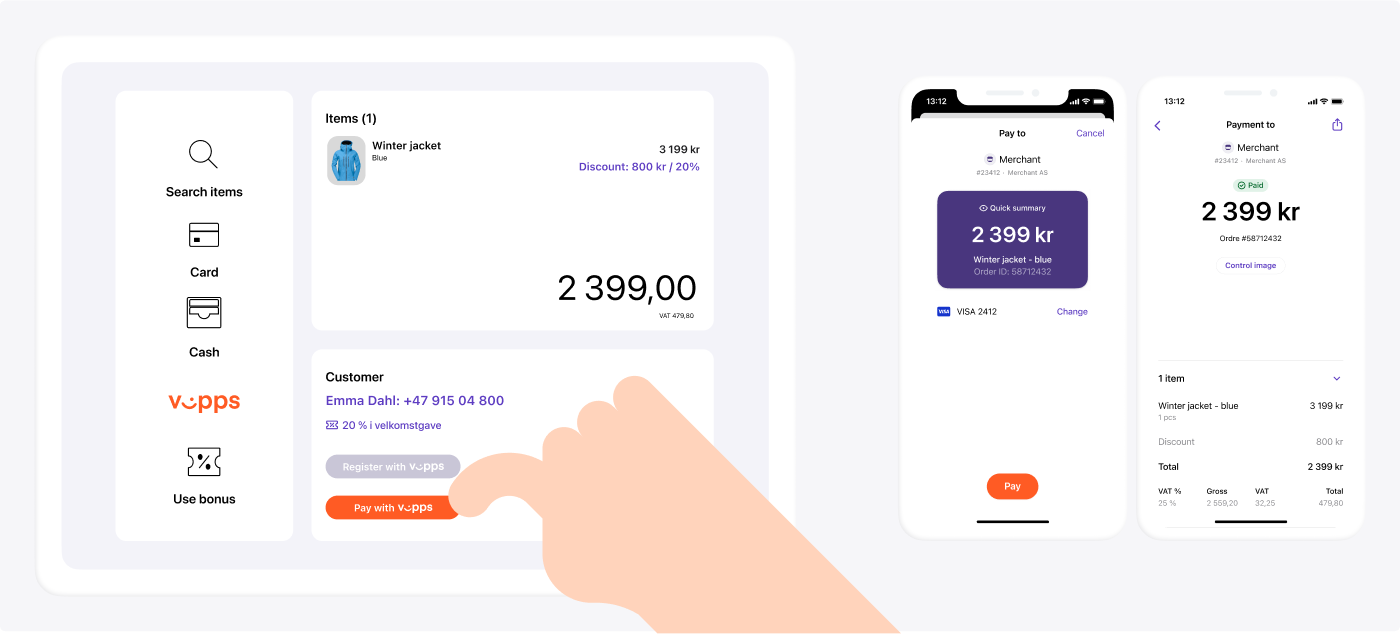
Step 6. Customer approves the payment
The payment request will appear in the customer's Vipps MobilePay app, where they can select to pay or cancel.
To get confirmation that payment was approved, monitor your webhooks.
Once the payment is approved, update the status in your system.
Step 7: Capture the payment
Capture the payment and confirm that it was successful.
Detailed example
POST:/epayment/v1/payments/{reference}/capture
With body:
{
  "modificationAmount": {
    "value": 239900,
    "currency": "NOK"
  }
}
Sequence diagram
Sequence diagram for in-store payment with customer club.