API guide
The Checkout API provides an all-in-one solution for receiving payment for goods and services online using trusted Vipps technology and brand. It combines the Vipps MobilePay products, Login and ePayment, allowing a frictionless integration for merchants.
API version: 3.0.0.
Please note: Always use the most recent API version when integrating with Vipps Checkout. All endpoints are described in detail in our API Reference.
Migrating to V3? Consult our Migration Guide.
Checkout Features
Explains the high level features of Vipps Checkout.
Vipps Checkout API
Vipps Checkout works around the concept of a session, which has a time to live of one hour. The API exposes endpoints for the merchant to interact with a session. These include:
- session initiation
- session status
Vipps Checkout frontend
Once a session is created, it is to be opened inside an iFrame embedded on the merchant website. The iFrame loads a web application that fetches all necessary information about the session from Vipps.
Frontend SDK
Vipps provides a frontend SDK to make opening the session on the merchant easy (the SDK is explained in detail later in this guide).
It is strongly recommended using the frontend SDK. If you do not use the SDK your implementation will require far more coding, and you will not get improvements and bug fixes we do in the SDK.
Shipping
In most situations a merchant wants to send goods to a customer using a shipping provider. Consult the shipping guide and the API spec for a detailed description of which shipping providers and features Vipps Checkout support.
Vipps Checkout Direct
With Vipps Checkout Direct you can easily implement an express checkout experience directly from a single product without going through a shopping cart. Vipps Checkout Direct decouples you from needing to embed the iFrame and lets us handle everything at checkout.vipps.no before returning the customer to your shop after a payment is finished. To use Vipps Checkout Direct, follow the System integration guidelines and make sure you pick Alternative 2 under Step 2: Displaying the session to the user.
Vipps Checkout Elements
With Vipps Checkout Elements, you can adjust the fields and values present in the Checkout. For example, you might have a purchasing flow where you do not require an address because you are not sending physical goods, or you do not need the customers to identify themselves because they are already logged into your system.
The Elements mode is set by configuration.Elements in initiate session.
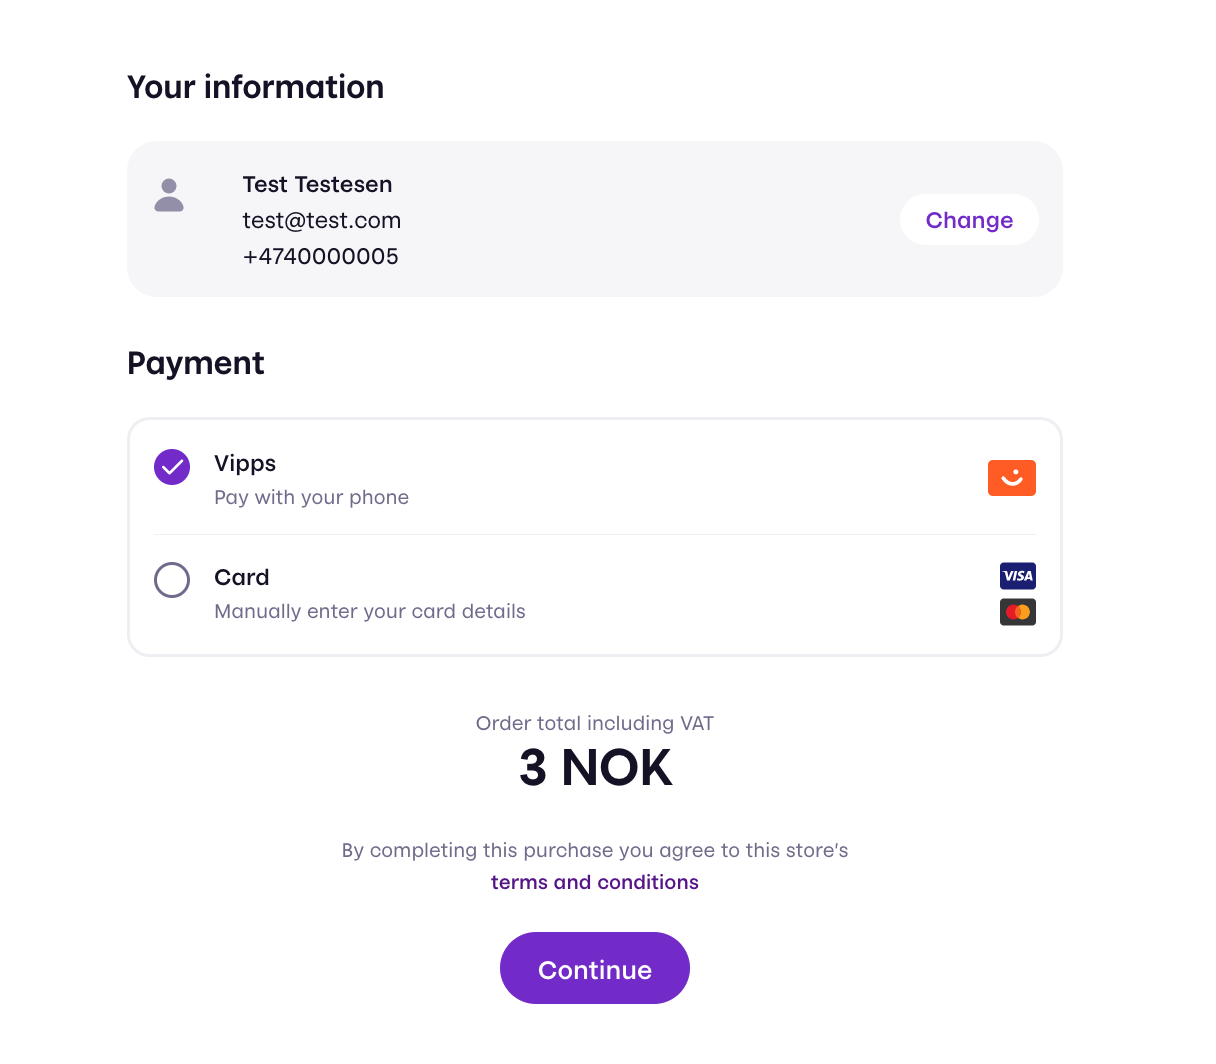
PaymentAndContactInfo example
If you do not need the address from a user you can disable it using Elements set to PaymentAndContactInfo, resulting in the following personal details form.

And the following payment form
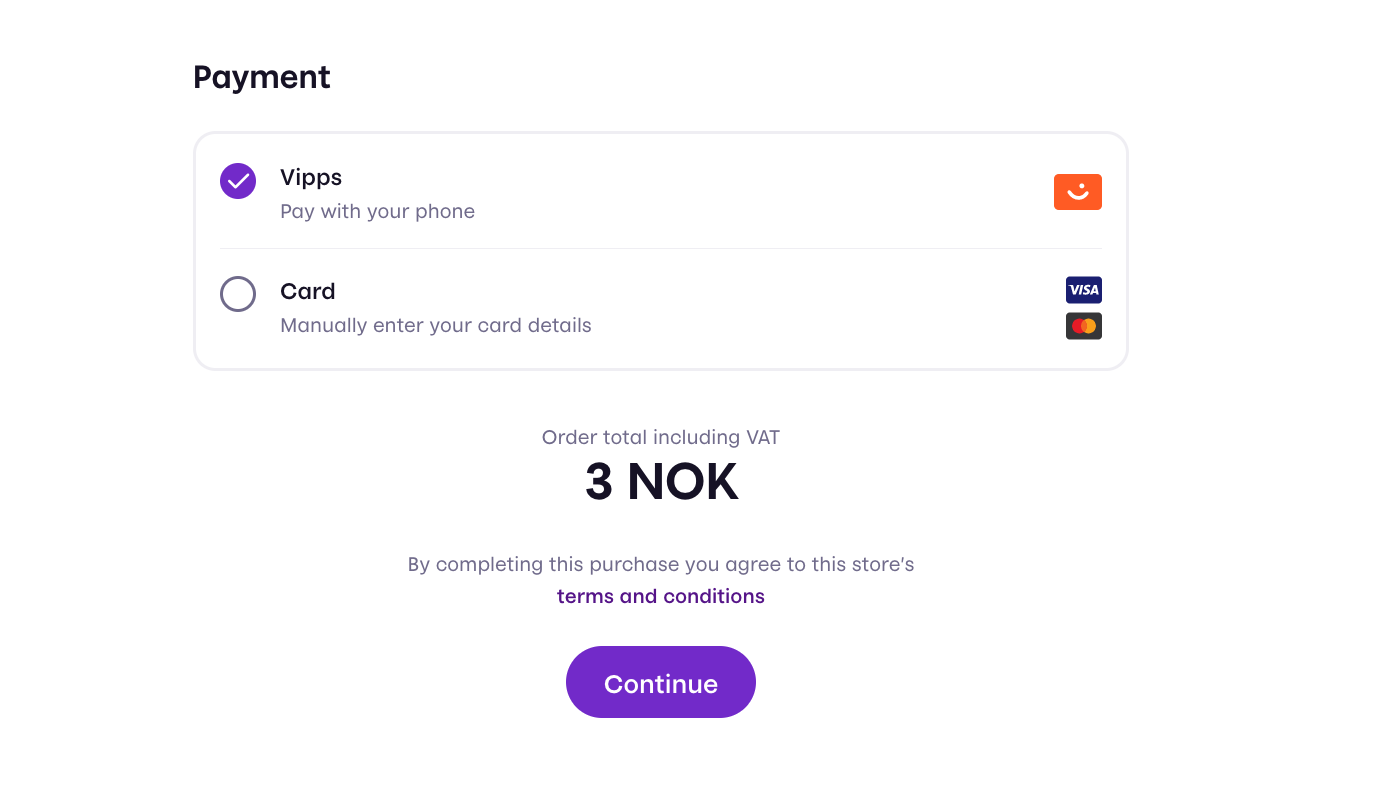
PaymentOnly example
If you do not need the contact details for a customer you can disable it using Elements PaymentOnly, resulting in the following session
Combination with shipping
These options may be combined with shipping if it fits your scenario. For example resulting in the following session:

Remembering of customer data
Vipps Checkout supports easy fetching of user info with the built-in Vipps Login integration. With a functionality called "Remember Me", the user is can opt in to having this information being persisted across different Vipps Checkout sessions on the same machine.
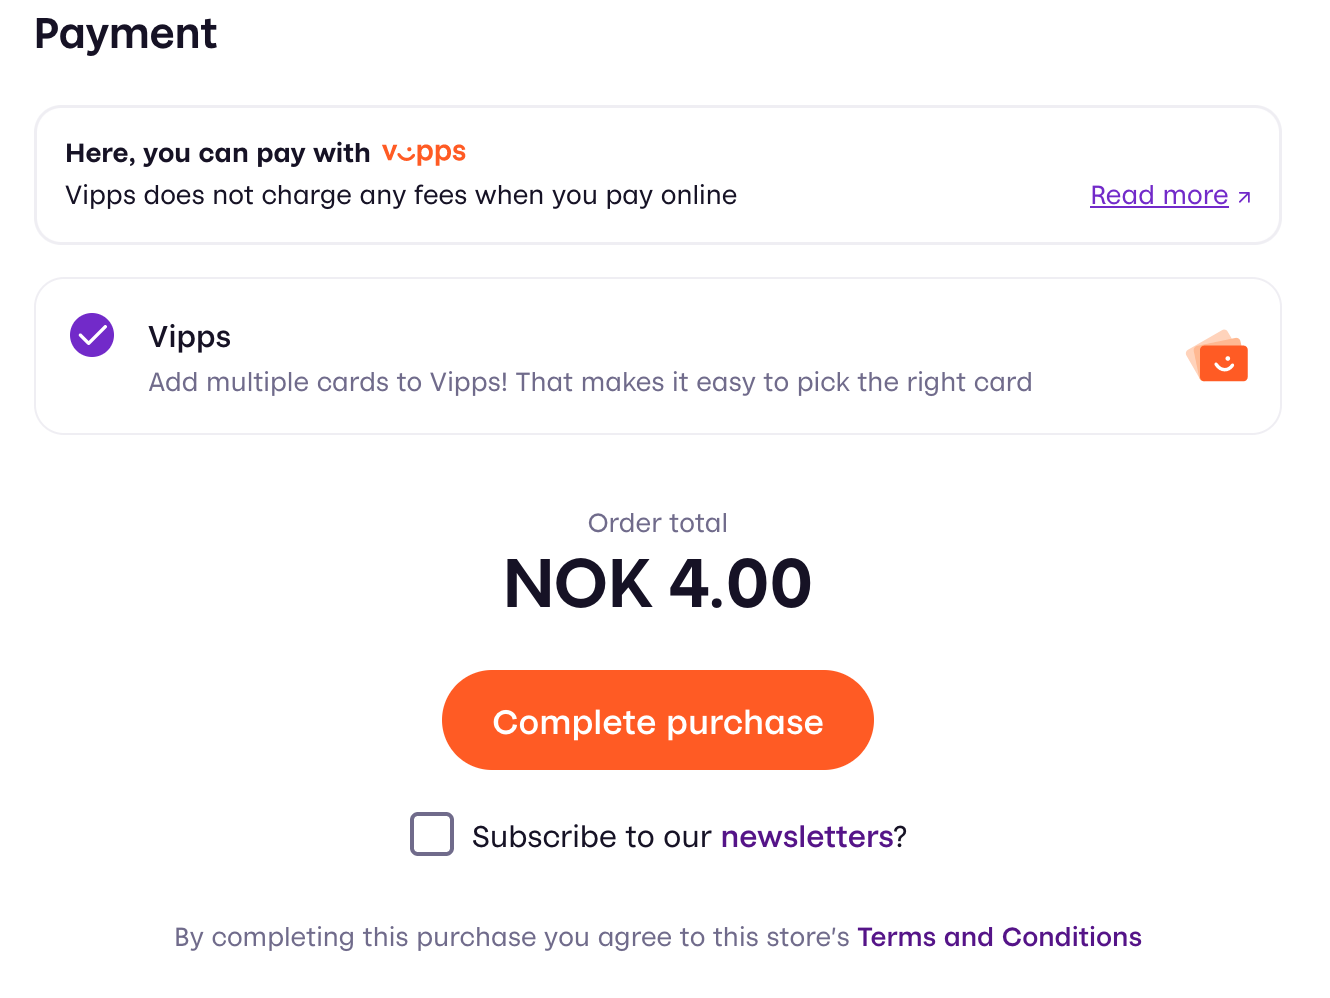
Custom consent
Sometimes you need to ask your customers for permission for certain actions, such as subscribing to newsletters. That's where our "custom consent" feature comes in handy!
When you enable "custom consent", a checkbox with a message appears at the bottom of the checkout page. Your customers can choose to check this box if they want to give their consent. You can make the checkbox optional or required, depending on your needs.
The message displayed next to the checkbox can contain up to one link, formatted in markdown like this: [linkText](https://example.com). This allows you to direct customers to additional information or resources related to the consent request.
Receipts
Vipps Checkout (V3 only) supports creating receipts, visible in the App. This can be useful in many cases, and a receipt can be mandatory in some cases as described below. It is possible to post the order lines and bottom line to the Order Management API independently, without using the functionality described in this section. Then you need to use The Order Management API directly.
To enable Checkout to create receipts, the OrderSummary property in the session initiation must be set. Detailed information is available in the OpenAPI spec session initiation endpoint
Receipt information is a combination of a list of OrderLines and a BottomLine. An OrderLine is a description of each item present in the order. The BottomLine contains information regarding the order as a whole. It is possible to specify shipping costs in one or more OrderLines in the session initiation. If shipping is handled in Checkout and is not free, an order line with the shipping cost will be automatically added, even if shipping costs are specified in the session initiation.
If set up properly in the OrderSummary property in the session initiation, the receipt will be created when payment is initiated (by sending it to Order Management API), and will be visible in the customer's app when the payment is successfully completed.
Further details regarding receipts in The Order Management API
Show order summary
In addition to automatically creating receipts, setting up the OrderSummary property as described above enables the use of showOrderSummary: true inside configuration in the session initiation. This will display a simplified order summary, similar to the receipt, on top of the Checkout window. Use this feature if you would like to show what the user is paying for during the checkout. We show a simpler summary than the receipt using a subset of the properties inside OrderSummary. E.g. tax calculations are shown in the receipt, but not in the order summary. The following properties will be honored id, name, discount, giftcard, totalAmount, productUrl, isReturn, isShipping, currency, giftCardAmount, quantity

Receipts and Assisted Content Monitoring
Vipps offers assisted content monitoring as a way for Merchants to deal with the regulatory demands of content monitoring. For some merchants Vipps can utilize the merchant's webpage for content monitoring, continuously verifying that the actual products being sold coincides with the expected products. If you, as a merchant, do not have a permanent website that can be utilized for content monitoring, for example you do not have a user facing website or the website is ephemeral/short-lived then you must utilize Vipps Assisted Content Monitoring. In order to comply with Vipps Assisted Content Monitoring all transactions must be posted to the Order Management receipts functionality described in this section.
System integration guidelines
Be sure to always use the most updated version of the API when integrating.
See also: quick start guide.
Flow diagram
The standard flow for a Vipps Checkout consists of
- Initiating a session
- Displaying the session to the user
- Handling the result of the session
Step 1: Initiating a session
The merchant backend calls the session initiation endpoint
POST: https://api.vipps.no/checkout/v3/session
with headers
| Header | Description | Example value |
|---|---|---|
Merchant-Serial-Number | Vipps assigned unique number for a merchant. Found in Vipps portal | |
Client_Id | Client ID. Found in Vipps portal | |
Client_Secret | Client Secret. Found in Vipps portal | |
Ocp-Apim-Subscription-Key | Subscription key. Found in Vipps portal | |
Vipps-System-Name | The name of the ecommerce solution | woocommerce |
Vipps-System-Version | The version number of the ecommerce solution | 5.4 |
Vipps-System-Plugin-Name | The name of the ecommerce plugin | woocommerce-checkout |
Vipps-System-Plugin-Version | The version number of the ecommerce plugin | 1.4.1 |
The last four headers (starting with Vipps-System-) are meant to identify your system (and plugin). Please use self-explanatory, human-readable and reasonably short values.
All fields of the request body are described in our API Reference.
The response object consists of a token and a checkoutFrontendUrl, which are used in the next step
Configuration for use inside a native mobile application
Checkout can be used in an iOS or Android app to pay for goods and services. The Checkout frontend may then be opened directly inside a web view, instead of as an iFrame inside a merchant website.
In this situation, the merchant may wish to have a returnUrl to direct the user back to an application using a custom URL scheme (e.g. myapp://) instead of HTTPS. The frontend application will automatically try to detect if the user is on a mobile device, if so doing an "app switch" into the Vipps application, and then back to your application upon completion. Because of variations in devices and browser implementations there are certain edge cases where the device type is wrongly detected. Initiate the session with userFlow set to NATIVE_REDIRECT to ensure that the app switching is done consistently after payment.
Step 2: Displaying the session
Load the frontend SDK in the <head> section of the merchant website.
<head>
  <script src="https://checkout.vipps.no/vippsCheckoutSDK.js"></script>
</head>
Alternative 1: Classic implementation where Vipps Checkout is embedded in an iFrame on your site
This is the standard flow where Vipps Checkout is embedded on your site typically when a customer checks out a shopping cart. For direct checkout of a single item, see Vipps Checkout Direct. The two alternatives can work side by side in combination on your site.
The frontend SDK exposes a global function called VippsCheckout. Initialize this with the following parameters
| Parameter | Description | Optional |
|---|---|---|
checkoutFrontendUrl | Specifies where to load the iFrame content from. Comes from session creation response | No |
iFrameContainerId | The ID of the HTML element to contain the Checkout iFrame | No |
token | Token identifying the session. Comes from session creation response. | No |
language | Can be set to 'no' Norwegian, or 'en' English. This is optional and will default to 'en' English if not specified | Yes |
on | Listen to events from Checkout. See SDK events for more details. | Yes |
Example merchant website using Vipps Checkout frontend SDK to embed an iFrame with the session in plain html/js.
Please note: To call the “create session endpoint” you must include headers that contain secret keys (client secret, subscription key). The JavaScript in the example can be openly viewed by anyone as it is client side frontend code. Therefore, you must call your own backend from the JavaScript on the frontend, and then in that backend call the Checkout create session endpoint, so you don’t leak the keys.
<html>
  <head>
    <title>Merchant website</title>
    <script src="https://checkout.vipps.no/vippsCheckoutSDK.js"></script>
  </head>
  <body>
    <button type="button" id="checkout-button">Checkout with Vipps</button>
    <section id="vipps-checkout-frame-container">
      <!-- This is where the iFrame will be embedded -->
    </section>
    <script>
      document
        .getElementById("checkout-button")
        .addEventListener("click", function () {
          // Relay an initiate session request to Vipps Checkout API through the merchant's backend
          fetch("<MERCHANT BACKEND CREATE SESSION URL>", {
            method: "POST",
          })
            .then((response) => response.json())
            .then((data) => {
              var vippsCheckout = VippsCheckout({
                checkoutFrontendUrl: data.checkoutFrontendUrl,
                iFrameContainerId: "vipps-checkout-frame-container",
                language: "no",
                token: data.token,
              });
            })
            .catch((error) => {
              // Handle at least these two types of errors here:
              // 1. Fetch to create session endpoint failed
              // 2. Vipps Checkout frontend SDK not loaded resulting in VippsCheckout not being defined
            });
        });
    </script>
  </body>
</html>
Please note: The Checkout frontend is not supposed to be open in its own browser window/tab. The only exception to this is when using Checkout inside a web view in a native mobile application.
Sticky checkout session
The frontend SDK provides an alternative way to display the session, using a query parameter in the URL. This makes the session "sticky", meaning that the same session will open after a page refresh.
If the query parameter token is present and the token attribute in the argument object to VippsCheckout is not defined, the frontend SDK will load the iFrame with the token from the query parameter.
A helper method, when called, will redirect to the current page with the token query parameter added to the URL. Initialize the VippsCheckout function outside initiating a session.
Please note: Make sure to initialize VippsCheckout outside any user dependent execution blocks (like event handlers) to make sure that the iFrame is loaded every time a user lands on the page.
// Globally defined
var vippsCheckout = VippsCheckout({
  checkoutFrontendUrl: data.checkoutFrontendUrl,
  iFrameContainerId: 'checkout-iframe-container',
});

// Create session fetch function
.then((data) => {
  vippsCheckout.redirectToCurrentPageWithToken(data.token)
})
Frontend SDK events
You can listen to changes in Checkout by supplying callbacks to the on option in the frontend SDK.
Each key in the map supplied to on corresponds to an event and accepts a call callback-function with a data parameter as a value.
Available events:
| Parameter | Description | Type |
|---|---|---|
shipping_option_selected | Is triggered when the user selects a shipping option or undefined when shipping option is deselected. | ShippingOption | undefined |
total_amount_changed | Is triggered when the total amount changes (for example, when a shipping option is selected). | Money |
session_status_changed | Is triggered upon changes in session status (for example, when payment is started). | SessionStarted | PaymentInitiated | PaymentSuccessful | PaymentFailed | SessionTerminated | SessionExpired |
shipping_address_changed | Is triggered when a new "delivered to" address is submitted or undefined when removed. | Address | undefined |
customer_information_changed | Is triggered when new customer information is submitted or undefined when removed. | Address | undefined |
Types
ShippingOption
| Parameter | Type | Description |
|---|---|---|
id | string | The merchants shipping option identification. |
brand | string | The name of the brand of the option (for example "Posten" or "PostNord"). |
description | description | undefined | The description of the shipping option. |
product | string | The brand specific product (for example, "Servicepakke" or "Home delivery"). |
price | Money | The price of the shipping option. |
Money
| Parameter | Type | Description |
|---|---|---|
fractionalDenomination | number | Value of in minor units. For Norwegian kroner (NOK) that means 1 kr = 100 øre. Example: 499 kr = 49900 øre. |
currency | string | Three letter ISO-4217 currency code. |
Address
| Parameter | Type |
|---|---|
address | string |
city | string |
country | string |
email | string |
firstName | string |
lastName | string |
phone | string |
zip | string |
Example
window.VippsCheckout = {
  checkoutFrontendUrl: data.checkoutFrontendUrl,
  iFrameContainerId: "vipps-checkout-frame-container",
  language: "no",
  token: data.token,
  on: {
    shipping_option_selected: function (data) {
      // Do something when the shipping option is selected
    },
    total_amount_changed: function (data) {
      // Do something when the total amount changed
    },
    session_status_changed: function (data) {
      // Do something when status changed
    },
    shipping_address_changed: function (data) {
      // Do something when shipping address changed
    },
    customer_information_changed: function (data) {
      // Do something when customer information changed
    },
  },
};
Alternative 2: Vipps Checkout Direct - we handle the checkout and redirect the user back to you
To check out a single item directly, use Checkout Direct. Hook this flow up on a button directly on a product, and we handle the rest by redirecting the user to checkout.vipps.no where we handle the checkout. We will return the customer back to your site when finished.
We also have a button with the Vipps look-and-feel that you can use (if you so choose) to make the integration super easy on your product page!
The frontend SDK exposes a global function called VippsCheckoutDirect. Initialize this with the following parameters
| Parameter | Description | Optional |
|---|---|---|
checkoutFrontendUrl | Specifies where to load the iFrame content from. Comes from session creation response | No |
token | Token identifying the session. Comes from session creation response. | No |
language | Can be set to 'no' Norwegian, or 'en' English. This is optional and will default to 'en' English if not specified | Yes |
Please note: To call the session creation endpoint, you must include headers that contain secret keys (client secret, subscription key). The JavaScript in the example can be openly viewed by anyone as it is client-side frontend code. Therefore, you must call your own backend from the JavaScript on the frontend, and then in that backend, call the Checkout create session endpoint, so you don't leak the keys.
<html>
  <head>
    <title>Merchant website</title>
    <script async type="text/javascript" src="https://checkout.vipps.no/vippsCheckoutSDK.js"></script>
    <script async type="text/javascript" src="https://checkout.vipps.no/checkout-button/v1/vipps-checkout-button.js"></script>
  </head>
  <body>
    <vipps-checkout-button id="checkout-button" variant="orange" branded="true"></vipps-checkout-button>
    <script>
      document
        .getElementById("checkout-button")
        .addEventListener("click", function () {
          // Relay an initiate session request to Vipps Checkout API through the merchant's backend
          fetch("<MERCHANT BACKEND CREATE SESSION URL>", {
            method: "POST",
          })
            .then((response) => response.json())
            .then((data) => {
              VippsCheckoutDirect({
                checkoutFrontendUrl: data.checkoutFrontendUrl,
                language: "no",
                token: data.token,
              });
            })
            .catch((error) => {
              // Handle at least these two types of errors here:
              // 1. Fetch to create session endpoint failed
              // 2. Vipps Checkout frontend SDK not loaded resulting in VippsCheckout not being defined
            });
        });
    </script>
  </body>
</html>
Please note: The VippsCheckoutDirect method in the frontend SDK can be used instead of VippsCheckout as per alternative 1, if you want to bypass the iFrame flow and let Vipps handle the checkout completely.
Step 3: Handling the result of the session
After the user has completed the checkout process, the merchant will be notified with transaction details through callback and polling, as described below.
Please note: It is highly recommended implementing polling in addition to callback. Vipps does not guarantee delivery of the callback.
Callback Handling
The callback will be sent to a callback endpoint (click on the "Callbacks" tab) implemented by the merchant.
POST: {merchantInfo.callbackUrl}
The callbackAuthorizationToken, provided by the merchant at session initiation, will be attached as the Authorization header. Use this to authorize the caller.
Vipps requires that every callback is answered with a HTTP 2XX response. In the eventuality that any other response is sent, Vipps will retry with an exponential backoff until 2XX is received again. The callback will be retried a maximum of 3 times.
Please keep in mind that Vipps does not guarantee delivery of the callback, so it is highly recommended implementing polling in addition to callback.
It is critical that the endpoint receiving the callback is robust. It should also be able to receive any additional data not specified in the minimum example, so that it can be backwards compatible in accordance with our integration guidelines.
Session polling
Checkout will expose a polling endpoint.
The complete URL for polling is returned from the
session creation endpoint
as pollingUrl.
Determine status of payment
The status of the payment can be CREATED, AUTHORIZED, or TERMINATED. It can be found inside the PaymentDetails object in both the callback or session polling response.
Note that a callback will never be in the CREATED state, as it is only sent after a payment is completed in an end state. For example, when a customer successfully pays, the PaymentDetails.state is AUTHORIZED. If the payment is initiated and ongoing, it will be CREATED. If the payment was either aborted, expired, or an error occurred, the state is TERMINATED. Please refer to the OpenAPI schema for CallbackSessionDetails and GetSessionResponse to see the whole context.
If you want more details about the payment, call the underlying get payment endpoint that Checkout itself uses.
Step 3a: If a transaction is authorized, capture payment
If the payment state of a session is AUTHORIZED, when received in callback or polling, the amount of the transaction was successfully reserved.
In order to actually move the money and complete the payment, the transaction must be captured. Capture must be done in accordance with the terms and conditions you have with the user. Our recommendation is that this is not performed until the goods or services have been delivered.
A capture operation for the whole reserved amount is called a full capture. A capture operation for only part of the reserved amount is called a partial capture.
A partial capture is used, for example, if only parts of an order could be fulfilled.
For more details about full and partial capture, see the ePayment API schema: POST:epayment/v1/{reference}/capture.
Please note: You cannot perform a capture on an amount larger than that which is reserved.
Please note: A reservation will expire automatically after some days if it is not captured, but it can also be manually removed using the Cancel transaction operation. If a transaction is already captured, the Refund operation must be used. This is because money has actually been moved at this point and must be moved back. See
Transaction operations for more information.
Integration partner and plugin guidelines
Vipps Checkout supports partner-key-based authentication.
In the initiation request, use your own credentials and send the Merchant Serial Number as described on the Partner keys page. This results in an on-behalf-of authentication that is available when the merchant has a valid connection to your solution.
Partner signup API guidelines
If you are using the Signup API, you need to use the "eCom access" key, instead of the old access token. This API is considered deprecated, and you should migrate to one of the supported APIs. See Deprecation of the Signup API for more information.
Transaction operations (Capture, Cancel, Refund, Details)
Vipps Checkout should be considered an extension of existing other Vipps commerce functionality.
This means that transaction operations other than payment initiation, which is handled by Checkout, should be done on the ePayment API. Use the same credentials as the ones you use with Checkout. See the ePayment guidelines for the integration.
Please note: That the eCom API should not be used, as it lacks full support for card transactions.
Vipps Checkout only supports Reserve/Capture
When you initiate a payment, it will be reserved until you capture it. The capture can be done a few seconds later, or several days later.
_Reserved means that the customer has approved the payment. The funds remain in the customer's account, but are not available for use. Capture* means that the funds are moved from the customer's account to the merchant's account. See Common topics: Reserve and capture for more information.
Please note: Direct Capture, where a transaction is automatically captured upon reservation, is not supported in Vipps Checkout, and transactions will fail.
Vipps side Transaction information
It is possible to get the Vipps transactionId value of a transaction. This can be used, for example, to utilize Order Management API: Vipps-assisted content monitoring or to support account procedures.
Recommended integration (currently in pilot mode)
In order to integrate with the receipt functionality,
you need to retrieve the PSP reference in the "paymentAction": "AUTHORISATION" event from the event log endpoint. This is required when using receipts with Checkout or freestanding card payments