API guide
The Order Management API allows merchants to enrich payments. The information given in this API will be shown to the customer in the order history in their app. Order Management operates with two concepts: Categories (with images) and Receipts. These concepts may be used separately or combined, and this guide will explain how to add them.
This information is shown to the customer in the app in their order history and immediately after in-store purchases.
Order Management enables you to communicate with your customers through the payment receipts in the app. The purpose of doing this is to give your customers more convenience, better overview and a more compelling shopping experience when they use Vipps MobilePay to pay for your products and services. Order management also enables you to draw customers back to your website or app from links on the receipt view.
This functionality is available for recurring and direct payments, but not for pass-through payments.
API version: 2.3.0.
Before you begin
Sign up your organization and retrieve your API credentials for the test environment from portal.vipps.no.
Authentication
All API requests are authenticated with an access token and an API subscription key. See Get an access token, for details.
HTTP headers
We recommend using the standard HTTP headers for all requests
See HTTP headers in the Getting started guide, for details.
Reference and PaymentType
Use order management to add a Receipt or Category to a transaction made with the ePayment, eCom, or Recurring API. The receipt is connected to a orderId (called reference in the ePayment API). The orderId is what you use when either initiating an eCom payment or creating a recurring charge.
The Order Management API does no validation if the order exists. This means that the order management enrichment may be added before or after the payment is actually created. The preferred way is to add the Order Management Data simultaneously as you initiate the payment.
As the same orderId can be used for both a Recurring charge and an eCom payment, you need to supply which product is being used by setting the appropriate paymentType - which is either ecom or recurring.
Basic flow
- Initiate an ePayment, eCom, or recurring payment
- Save the
orderIdyou used when initiating - Add an image (optional)
- Save the
imageId - Add a category with link and image
- Add a receipt
Note that you can also create a receipt directly in the ePayment API createPayment request.
Categories
The category concept may be added to a transaction to give extra information and can be used as a way to draw customers back to the merchant's web page. In addition to the category, it is possible to add an image to the transaction.
The following section will explain how to enrich a transaction with Categories and Images. Link and Category are required when using this API; whereas Images are optional.
Category
In order to provide customers with more up-to-date information about their order,
you can add a Category. This creates a link on the Transaction page of the Vipps MobilePay app and can take the
customer to a location on your website. Links are activated when a customer
clicks the corresponding button in the transaction page.
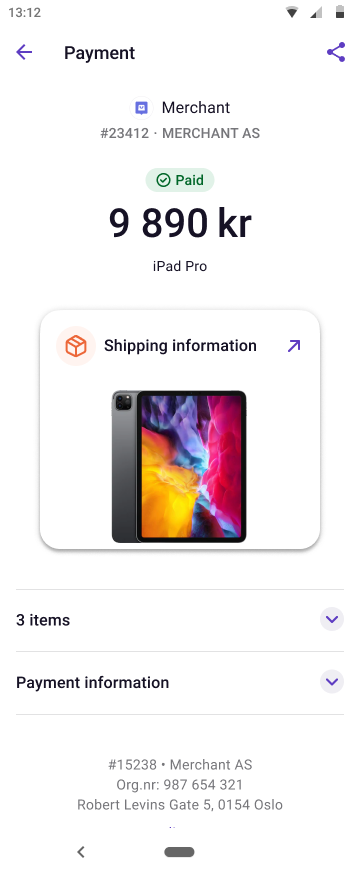
The mobile device's standard web browser will open, and the user will be redirected to the link location. Below you can see an example of a transaction with the "Shipping information" Category.
The category will determine how the app handles the link, additional information, and the push. You can only use one category. If you send more than one, only the last one will be shown in the app.
We currently support these categories:
| Category | Description | Example images |
|---|---|---|
Receipt | A link to a location where the customer can access and download a valid proof of purchase and receipt for this particular order. |  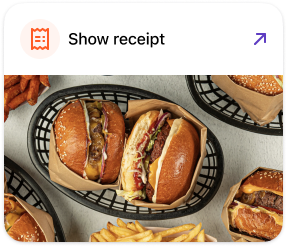 |
Order Confirmation | A link to a location that contains information and status of the order. If your webshop or site has a "My orders" page or similar, this link category can take the customer there. |  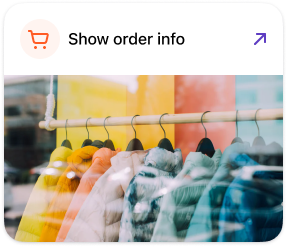 |
Delivery information | A link to a location that contains information and status about the shipping or delivery related to the order. This could be a link to a site hosted by your freight carrier, or a link to your site. If your webshop or site has a "My order" page that includes delivery related information about the order, this link category can be used. |  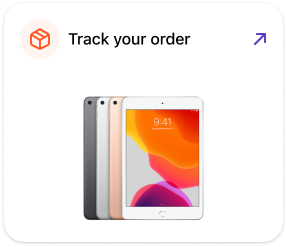 |
Ticket | A link to a location where the customer can access and download a ticket to an event, trip or transportation. |   |
Booking | A link to a location that contains information and status about a booking, such as travel and rental booking. If your webshop or site has a "My bookings" page or similar, this link category can take the customer there. |   |
General | If none of the other categories fit the use case for the link, a General category can be used. This is a link to a location that contains any kind of information pertinent to the order. |   |
Images
With the Order Management API, you can upload an image that is shown on the
transaction in the app. When adding an Image along with a Category, the Image must be uploaded beforehand. After uploading an image to
the POST:/images endpoint, the newly uploaded image's ImageId is used in the Categories endpoint.
The same image may be used for multiple transactions, but uploading a unique image for each
transaction is also OK. Images are fetched pre-authenticated from the app, so feel
free to add tickets and receipts as images. Below, you can see an example of a
transaction containing an image with the Shipping information category.
Adding an Image
The POST:/images
endpoint for uploading pictures. Images exist independently of any transaction.
It is not possible to overwrite an image. Base64 is the only supported media type at the moment.
Example request
Headers:
Authorization: Bearer eyJ0eXAiOiJKV1QiLCJhbGciOiJSUzI1Ni <snip>
Ocp-Apim-Subscription-Key: 0f14ebcab0ec4b29ae0cb90d91b4a84a
Merchant-Serial-Number: 123456
Vipps-System-Name: Acme
Vipps-System-Version: 3.1.2
Vipps-System-Plugin-Name: acme-webshop
Vipps-System-Plugin-Version: 4.5.6
Body:
{
  "imageId": "socks-orange-123",
  "src": "iVBORw0KGgoAAAANSUhEUgAAAKsAAADVCAMAAAAfHv...",
  "type": "base64"
}
The response will then look like this:
{
    "imageId": "socks-orange-123"
}
Adding and changing Category
The PUT:/{paymentType}/categories/{orderId}
endpoint is used for adding and updating the Category for a transaction.
The category is mutable, and a new request will completely overwrite previous requests.
Example request
{
"category": "GENERAL",
"orderDetailsUrl": "https://www.example.com/2486791691483852025",
"imageId": "socks-orange-123"
}
Receipts
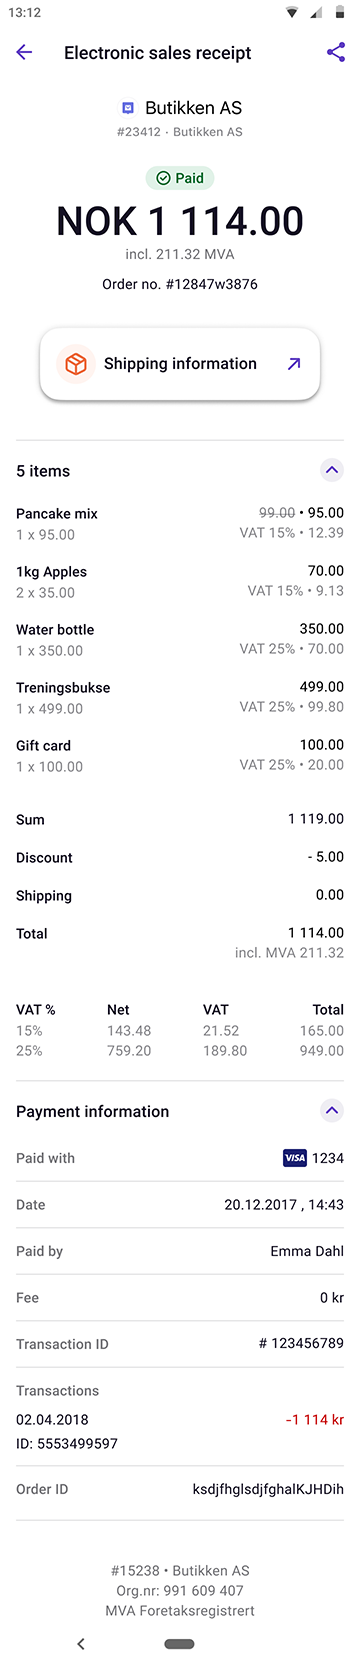
The receipt concept allows you to add order lines to a transaction. This can be used as proof of purchase when returning goods, as an electronic copy for expensing or in scenarios where a paper printer is not available. We also know our customers love this information.
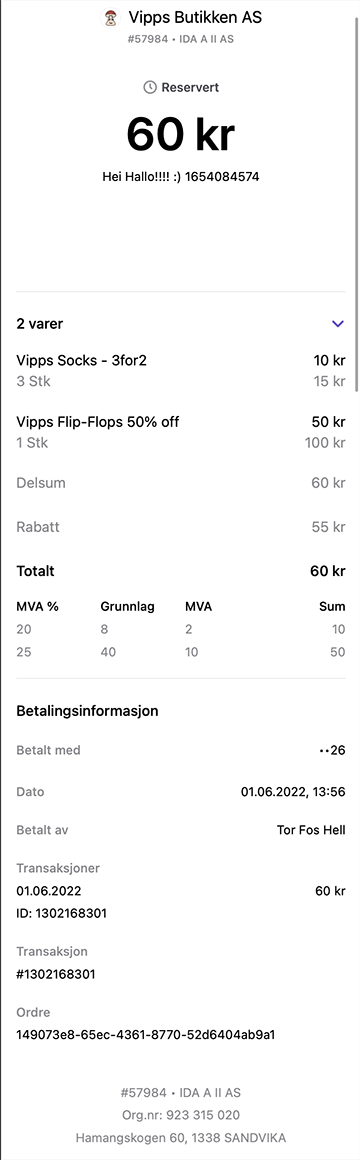
By using the POST:/{paymentType}/receipts/{orderId} endpoint, it is possible to add a Receipt to a transaction. This is done by sending each OrderLine with its relevant VAT info. The Sum of the receipt will be calculated based on the order lines that are sent in. In environments where a paper printer isn't accessible, this can be very valuable. The receipt generated in the Vipps app is an "electronic copy" and should be approved by all Norwegian accounting firms.
Adding a Receipt
The POST:/{paymentType}/receipts/{orderId}
endpoint is for sending receipt information.
Receipt information is a combination of order lines and a bottom line with sum and VAT. An OrderLine is a description of each item present in the order. Detailed information about each property is available in the OpenAPI spec. A receipt is immutable and, once sent, cannot be overwritten.
Example request
Headers:
Authorization: Bearer eyJ0eXAiOiJKV1QiLCJhbGciOiJSUzI1Ni <snip>
Ocp-Apim-Subscription-Key: 0f14ebcab0ec4b29ae0cb90d91b4a84a
Merchant-Serial-Number: 123456
Vipps-System-Name: Acme
Vipps-System-Version: 3.1.2
Vipps-System-Plugin-Name: acme-webshop
Vipps-System-Plugin-Version: 4.5.6
Body:
{
  "orderLines": [
    {
      "name": "Socks",
      "id": "line_item_1",
      "totalAmount": 1000,
      "totalAmountExcludingTax": 800,
      "totalTaxAmount": 200,
      "taxPercentage": 25,
      "unitInfo": {
        "unitPrice": 400,
        "quantity": "2.5",
        "quantityUnit": "KG"
      },
      "discount": 0,
      "productUrl": "https://example.com/store/socks",
      "isReturn": false,
      "isShipping": false
    },
    {
      "name": "Flip-flops",
      "id": "line_item_2",
      "totalAmount": 5000,
      "totalAmountExcludingTax": 4000,
      "totalTaxAmount": 1000,
      "taxPercentage": 25,
      "unitInfo": {
        "unitPrice": 2500,
        "quantity": "3",
        "quantityUnit": "PCS"
      },
      "discount": 2500,
      "productUrl": "https://example.com/store/flipflops",
      "isReturn": false,
      "isShipping": false
    },
    {
      "name": "Home delivery",
      "id": "shipping_1",
      "totalAmount": 1000,
      "totalAmountExcludingTax": 1000,
      "totalTaxAmount": 0,
      "taxPercentage": 0,
      "discount": 0,
      "isReturn": false,
      "isShipping": true
    }
  ],
  "bottomLine": {
    "currency": "NOK",
    "posId": "vipps_pos_122",
    "receiptNumber": "123456789"
  }
}
Fetching Category and Receipt
The GET:/{paymentType}/{orderId}
endpoint is used for getting both Category and Receipt for the transaction. The response body includes ID references to images previously uploaded, Links, and the OrderLines added.
Vipps Assisted Content Monitoring
We offer assisted content monitoring as a way for you to deal with the regulatory demands of content monitoring. For some merchants, we can utilize your webpage for content monitoring, continuously verifying that the actual products being sold coincides with the expected products.
Mandatory use case
If you, as a merchant, do not have a permanent website that can be utilized for content monitoring, then you must use Vipps Assisted Content Monitoring. This can be relevant if you, for example, do not have a user-facing website or the website is short-lived.
In order to comply with Vipps Assisted Content Monitoring, all transactions must be posted to the Order Management receipts functionality described in the Receipts section.