Vipps Checkout for Shopify
This plugin is built and maintained by Crude.
Download the plugin from the Shopify app store.
Install the Companion plugin to add branding and order information.
Description
Official Vipps Checkout for Shopify. More than 4.3 million Norwegians use Vipps. Give them a fast and familiar shopping experience.
This is the official Vipps plugin that provides a direct integration with Shopify. Now you can let your customers choose Vipps directly in the checkout.
You can also do important back office tasks such as capture and refund directly from Shopify. Easy for your customer and easy for you.
The Vipps product page: Vipps for Shopify.
Vipps vs Vipps Checkout? What's the difference?
For the moment, there are two payment methods offered from Vipps available in Shopify, Vipps (called Vipps 2.0) and Vipps Checkout. Vipps Checkout is the latest one. Vipps 2.0 will be depreciated and replaced completely by Vipps Checkout in the future, so we suggest installing Vipps Checkout right away.
Vipps Payment
When you enable this plugin, your customers will be able to choose Vipps as a payment method directly in the checkout. There is no need to go via a third party payment method. If your customer chooses Vipps, the customer fills in the contact information and is then asked to enter the phone number in the Vipps dialogue. Then the customer confirms the payment in the Vipps app. The order is now completed and are now stored in your Shopify store.
Please note: Vipps does not have a solution for Vipps Hurtigkasse ("Express Checkout") in Shopify. This is due to limitations on Shopify's side, and if Shopify makes changes that make Vipps Hurtigkasse possible, we will add this functionality.
How to get started
- Sign up to use Vipps på Nett on portal.vipps.no.
- After 1-2 days, you will get an email with login details to Vipps Developer Portal, where you can get the API credentials
- Download and configure
How to get Vipps account keys from Vipps Developer Portal
- Sign in to the Vipps Portal using BankID.
- Select the Utvikler ("Developer") tab and choose Production Keys. Here, you can find the merchant serial number (6 figures).
- Click on Show keys under the API keys column to see Client ID, Client Secret, and Vipps Subscription Key.
See Getting Started and the FAQ.
Installation
Step 1 - Preparations
Make sure you have easy access to the API keys, by logging in to Vipps Portal and find the correct API keys.
Pro-tip: If you are migrating from the old Vipps gateway (called Vipps 2.0 in Shopify), don't uninstall it yet, as we can autofill the API keys for you if it's installed. Makes it way easier for you to migrate. :)
Step 2 - Install Checkout app
Go to Shopify App store via this link and install the Vipps Checkout app from there.
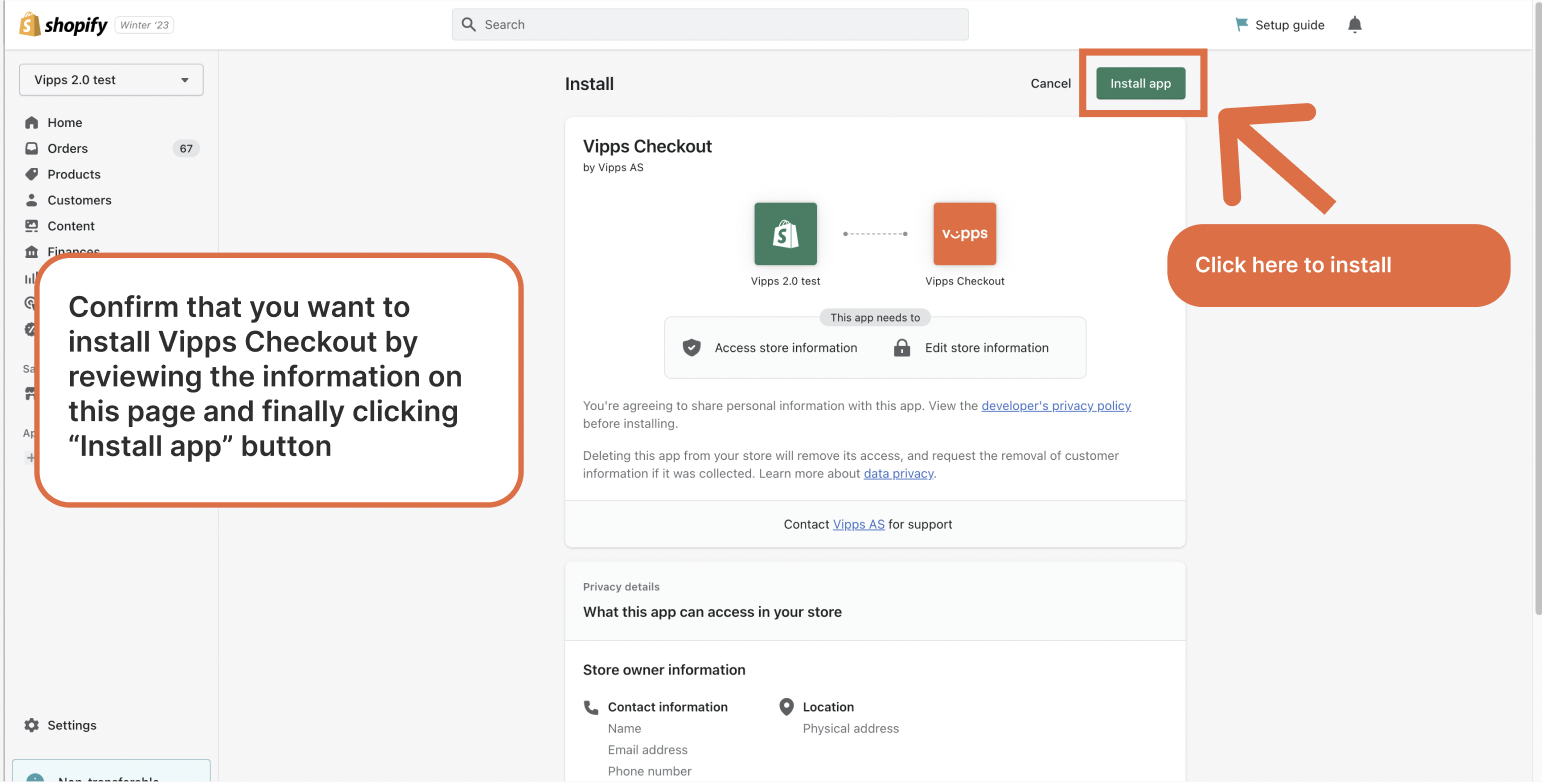
Step 3 - Confirm and install
Confirm that you want to install Vipps Checkout by reviewing the information on the page and clicking the Install app button.
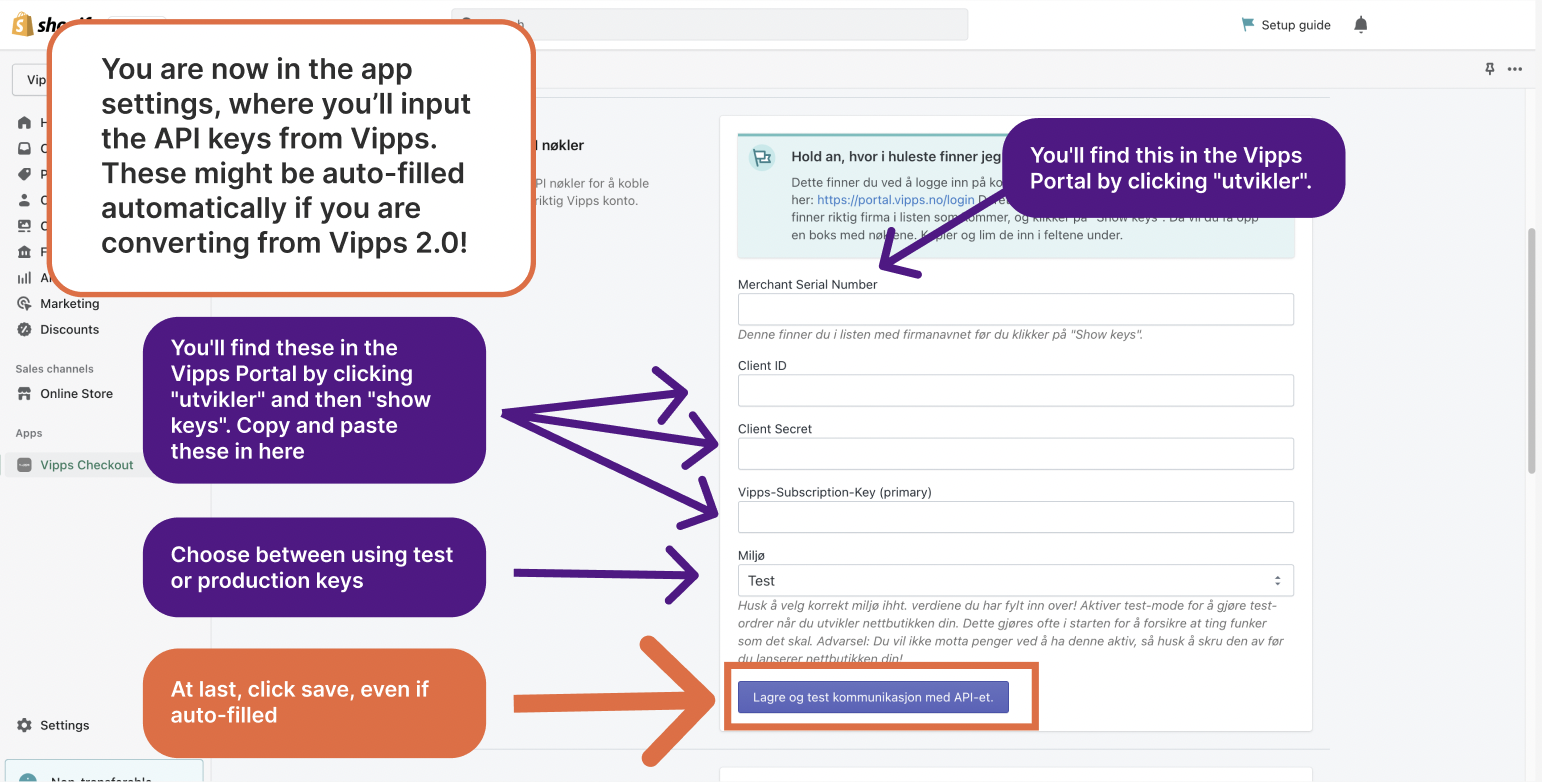
Step 4 - Input API keys
Go to the app settings. Input the API keys from Vipps. These may be autofilled if you are converting from Vipps 2.0.
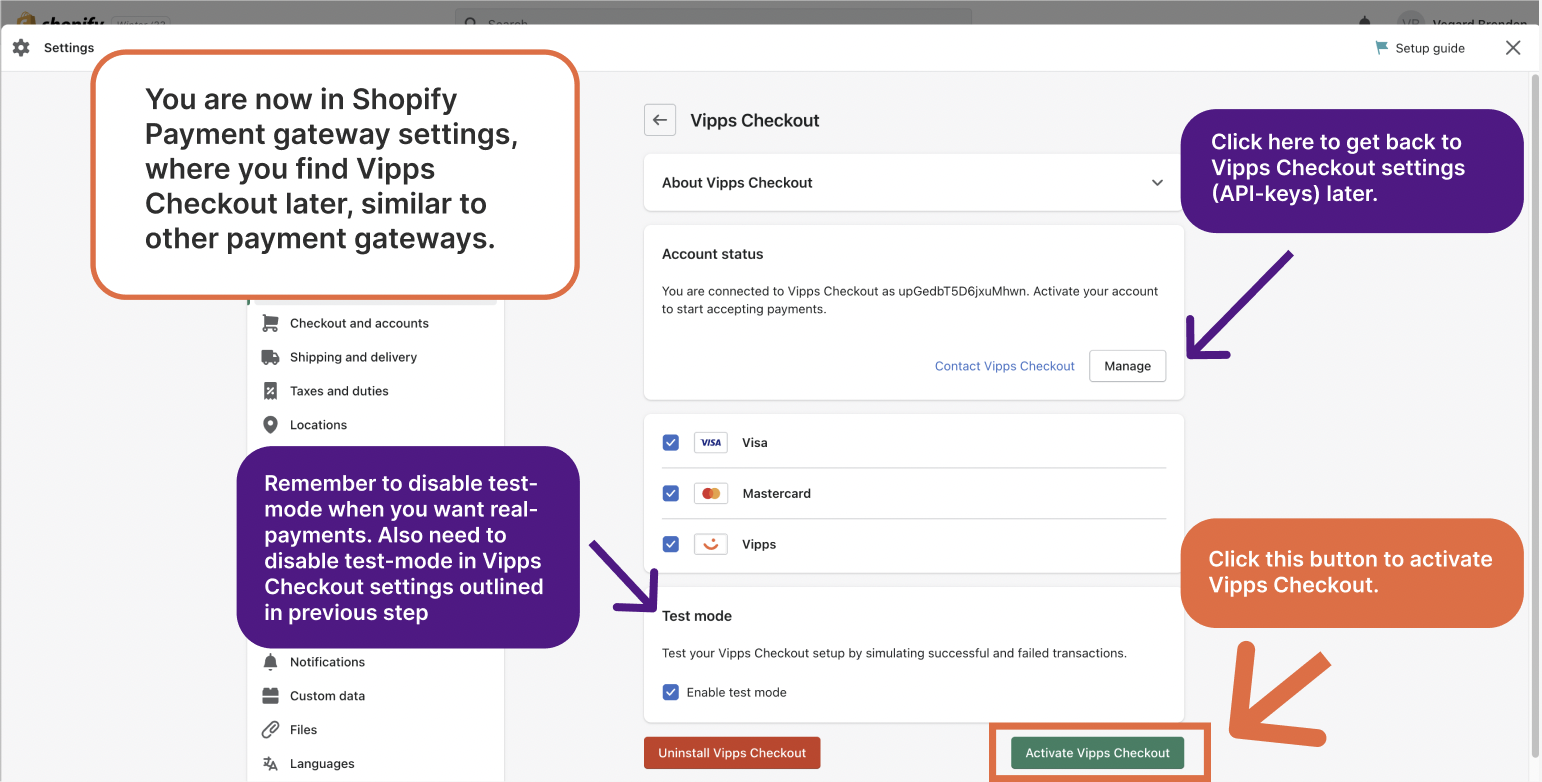
Step 5 - Activate Checkout
In the Shopify Payment Gateway settings, activate Vipps Checkout.
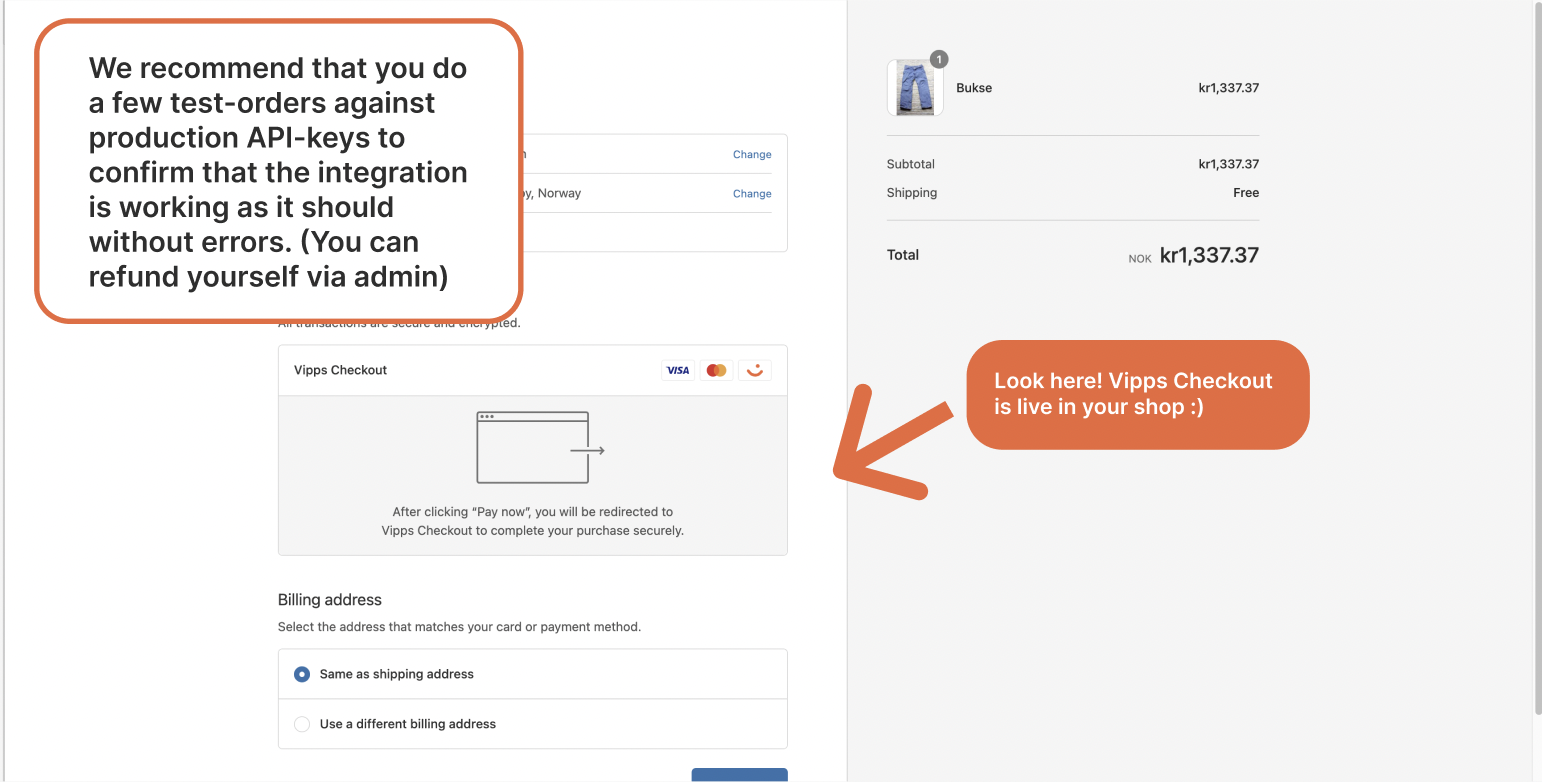
Step 6 - Test
Do a few test orders against the production API keys to confirm that the integration is working without errors.
Step 7 - Clean up
If you were migrating from Vipps 2.0 in Shopify, you can safely remove it from Shopify now.
What do the different order statuses mean?
See Shopify Order statuses with Vipps for information regarding order statuses.
How can I get help if I have any issues?
For issues with your Vipps for Shopify installation, contact us via our support system here.